Baja Knot
Heavy mono/fluoro terminal for stout leaders.
Intermediate · Monofilament / Fluorocarbon
Connection card
Baja Knot
For line → hook, line → lure.
This card does not say how strong the knot is. A retention figure comes from a bench, in one material, at one diameter, tied by somebody who ties it all day — and the line in your hand is none of those. What it does tell you is whether the thing you have just tied is the thing the record describes.
What this plate is telling you
Heavy mono/fluoro terminal for stout leaders.
Save this as a picture and it works with a dead signal and a nearly dead battery, which is when a joint is most often tied badly. The rest of this page — the steps, the seating sequence, the failure modes and the bench — is for the evening before.
Before you start
- ·NetKnots describes it for heavy mono leader. The hook hangs from a fixed loop instead of being clamped to the line, so live bait can move more naturally.
- ·Have pliers ready, or a boat rail to hold the hook. Heavy mono does not seat under hand pressure alone.
- ·Form the first loop several inches from the end of the line. The small and medium loops use up the tag.
- ·Cast and Spear suggests wetting the line before cinching, to reduce the friction heat that weakens mono.
Step 1 of 4. Pass the line through the hook eye. Form a large loop several inches from the end of the line and slide the hook down so it hangs freely at the bottom of that loop.
No drawing of this exact knot yet. The written steps are the reference.
swipe to step
01
Pass the line through the hook eye. Form a large loop several inches from the end of the line and slide the hook down so it hangs freely at the bottom of that loop.
A large open loop in the line with the hook hanging from its lowest point, and several inches of tag left for the next two loops.
Forming the first loop too close to the end. The second and third loops use up the tag, and stiff heavy mono is hard to handle with a short end.
Fix: Open the loop and form it again further from the end, so several inches of tag are free.
Why: NetKnots describes the Baja as a Perfection Loop with the hook tied into the loop. The hook hangs from a fixed loop instead of being clamped to the line, so a live bait can move more naturally.
- Too few wraps for the diameter — Unwraps or heats under load. Heavy fluoro needs the wrap count the diameter asked for.
arrow keys work
Tying procedure — Baja Knot
- Diagram in reviewA drawing of the Baja Knot itself is being made. Until then, follow the written steps.
Step 01 / 4
Pass the line through the hook eye. Form a large loop several inches from the end of the line and slide the hook down so it hangs freely at the bottom of that loop.
You should now see: A large open loop in the line with the hook hanging from its lowest point, and several inches of tag left for the next two loops.
If it goes wrong: Forming the first loop too close to the end. The second and third loops use up the tag, and stiff heavy mono is hard to handle with a short end.
Fix: Open the loop and form it again further from the end, so several inches of tag are free.
Why: NetKnots describes the Baja as a Perfection Loop with the hook tied into the loop. The hook hangs from a fixed loop instead of being clamped to the line, so a live bait can move more naturally.
If wrong: Too few wraps for the diameter — Unwraps or heats under load.
- Diagram in reviewA drawing of the Baja Knot itself is being made. Until then, follow the written steps.
Step 02 / 4
Run the tag across the front of the first loop and behind the standing line to make a second loop, and pull it much smaller than the first. Repeat to make a third, medium-sized loop.
You should now see: Three loops held in your pinch: the large one with the hook, a small one and a medium one, with the tag lying between them and nothing twisted.
If it goes wrong: Letting go of the pinch, so the smaller loops twist or cross over each other. The hook then cannot pass cleanly and the knot draws up lopsided.
Fix: Undo back to the first loop and form the second and third again, pinching each one where it crosses the standing line.
Why: The small and medium loops lie around the base of the large loop. When the knot is drawn up they close around it, and that is what stops the hook loop from slipping.
If wrong: Crossed heavy fluoro wraps that will not dress — Heat and a weak side under a hard run.
- Diagram in reviewA drawing of the Baja Knot itself is being made. Until then, follow the written steps.
Step 03 / 4
Slide the hook to the top of its loop and pass it over the middle loop and under the top loop, then draw the knot up semi-tight.
You should now see: The hook sitting at the top of its loop, the three loops closed partway around it, and the knot starting to take shape above the hook.
If it goes wrong: Passing the hook under the middle loop or over the top loop. The knot then slips or comes apart when the standing line is pulled.
Fix: Loosen the loops, back the hook out and pass it again: over the middle loop, then under the top loop.
Why: The hook's path over the middle loop and under the top loop is what locks the finished loop. Drawing up only semi-tight here lets the loops settle evenly before the final pull.
If wrong: Sawing dry heavy fluoro on the seat — The line is already glazed.
- Diagram in reviewA drawing of the Baja Knot itself is being made. Until then, follow the written steps.
Step 04 / 4
Hold the hook with pliers or against a boat rail, pull the standing line hard to set the knot, then trim the tag.
You should now see: A fixed loop with the hook hanging from it and a compact knot above that does not move when you pull the standing line hard.
If it goes wrong: Setting heavy mono by hand alone. The loops stay partly open and the hook loop can change size under a hard pull.
Fix: If the knot slips or the hook loop changes size under a hard pull, cut it off and tie again.
Why: Heavy mono does not seat under hand pressure alone. Anchoring the hook and pulling the standing line hard closes the loops down, and NetKnots notes the knot does not slip once tightened this way.
Watch the tie
How to tie the Baja Knot — heavy fluoro or mono leaderHooks and Knots · Opens on YouTubeExternal video from a creator we follow — not produced by us. Nothing on this page loads from YouTube until you follow the link.
Seating sequence — where failures are born
The step list compresses the finish. Run these phases in order, one at a time.
01 Moisten
Wet the structure before any load reaches it.
Zero. Nothing tightens yet.
02 Load
Take up slack slowly until the wraps begin to gather.
Light and even — both ends moving together.
03 Dress
Watch the wraps stack in order; stop and back off if any cross.
Hold, do not pull. Correction happens here or not at all.
04 Set
One continuous pull to full seat — no sawing, no jerks.
Firm, single direction, standing line against the terminal end.
05 Trim
Cut the tag square, leaving a short stub proud of the knot.
None. Never trim under load.
Finished structure — what correct looks like
No drawing of this exact knot yet. The written steps are the reference.
- ·Terminal wrap stack at eye or along shank
- ·Fully seated to eye or shank
- ·Tag exits clean and short
- ·Even wraps, no crossings
Verify before you load it
Every line is pass or fail. One fail means retie — do not load a knot you argued with.
- 01Terminal wrap stack at eye or along shank
- 02Fully seated to eye or shank
- 03Tag exits clean and short
- 04Even wraps, no crossings
- 05None
- 06baja
Field notes — dark, cold, gloves
- ·Retie by feel first, light second — the seat is a tactile event, not a visual one.
- ·Gloves off for the dress phase. Fabric hides a crossing wrap.
- ·Wrong twice in a row means the material or the hardware is fighting you. Change one, not your technique.
Baja Knot — finished-state checks, on the shared reference layout
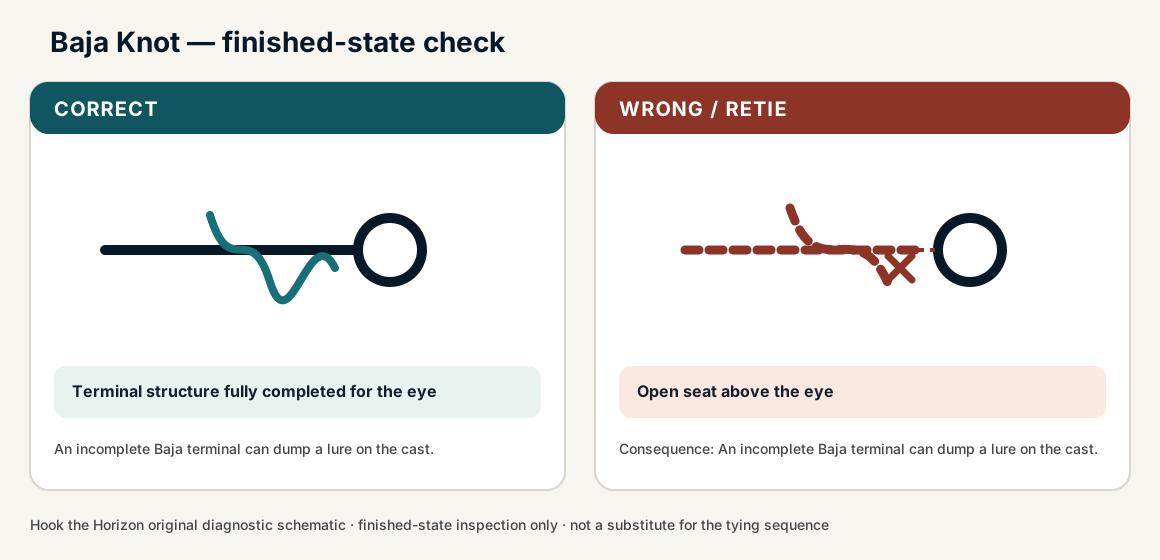
When this family fails, it fails as these. The recovered end still outranks the name.
A loop that stays the size you made, with a return that cannot cinch.
- !Loop cinched around the hardware — action is dead
- !Return path reversed, so it becomes a slip loop
- !Fluoro in a lock that only behaves on mono
- !Hook passed under the middle loop or over the top loop
- !Drawn only semi-tight, without anchoring the hook and pulling the standing line hard
- !Small loops twisted or crossed, so the knot draws up lopsided
- !Cinched dry, so friction heat weakens the mono
Crossed heavy fluoro wraps that will not dress
Heat and a weak side under a hard run
Baja on stiff fluoro needs even wraps before the set · step 02
Too few wraps for the diameter
Unwraps or heats under load
Heavy fluoro needs the wrap count the diameter asked for · step 01
Sawing dry heavy fluoro on the seat
The line is already glazed
Wet the seat; a dry cinch on stiff fluoro is a retie · step 03
Hook does not hang freely from the finished loop or the knot distorts while seating
Check
- ?Identify the large first loop, smaller second loop, and medium third loop before moving the hook
- ?Confirm the hook goes over the middle loop and under the top loop
Then
- →Retie from the three-loop sequence; do not force a mis-routed knot to seat
Knot body remains loose or creeps when heavy mono is loaded
Check
- ?Finished body is compact
- ?Hook still hangs from a free non-slip loop
- ?No loop in the three-loop structure remains loose
Then
- →Wet the knot and set it firmly with controlled tension
- →Retie if the loop order will not dress compactly
Finished check failed — Open seat above the eye
Check
- ?Terminal structure fully completed for the eye
- ?Seated coil without gaps
- ?Tag controlled
Then
- →Retie. An incomplete Baja terminal can dump a lure on the cast.
Crossed heavy fluoro wraps that will not dress
Check
- ?Heat and a weak side under a hard run
- ?Inspect step 02
Then
- →Retie. Do not dress a defective structure and call it seated.
Too few wraps for the diameter
Check
- ?Unwraps or heats under load
- ?Inspect step 01
Then
- →Retie. Do not dress a defective structure and call it seated.
Sawing dry heavy fluoro on the seat
Check
- ?The line is already glazed
- ?Inspect step 03
Then
- →Retie. Do not dress a defective structure and call it seated.
Same failure class, different geometry. Open the plates — Diagnose still starts from the symptom.
Get it right with everything in your favour0/5 clean
Good light, dry hands, a table. Until the sequence is automatic here there is nothing for the harder rungs to test — you would only be learning that difficult conditions are difficult, which you already knew.
How · Tie it, check it against the list, log it. Five clean and the ladder opens.
Nothing marked. Log it clean, or mark what happened first.
Not ideal for
- ×Light tippet fly work
- ×Tiny eyes
Strength, and where the number comes from
Not established
No published break test; NetKnots documents it without a strength claim.
Percentages come from published tests on their own line, their own knot-tyer and their own pull rate. Yours is a different system. Treat a figure as a reason to test, not as a result you already have.
- NetKnots — Baja Knot
Field practice (heavy mono/fluoro terminals)no link on file
- Hook the Horizon — Baja Knot
Recovered from the same record’s historical Hook the Horizon resource URL.
Record reviewed 2026-08-13
Vetted references
- Baja Knot
Hook the Horizon
- How to tie the Baja Knot — heavy fluoro or mono leader
Hooks and Knots
Check the finished knot against what correct looks like before you load it.