Non-Slip Mono Loop
Kreh loop · Nonslip mono loop
Fixed-size non-slip loop for free-swinging lures and flies.
Finished structure
Drawn from a rope model of this knot: which strand passes over which comes from where the rope actually lies.
- 1Loose overhand2Tag through the eye
Move 1 of 1Tie a loose overhand in the line, then push the tag through the eyeYou should now see: An open overhand in the line, the lure on the tag below it, and a long tag past the eye. Step 01
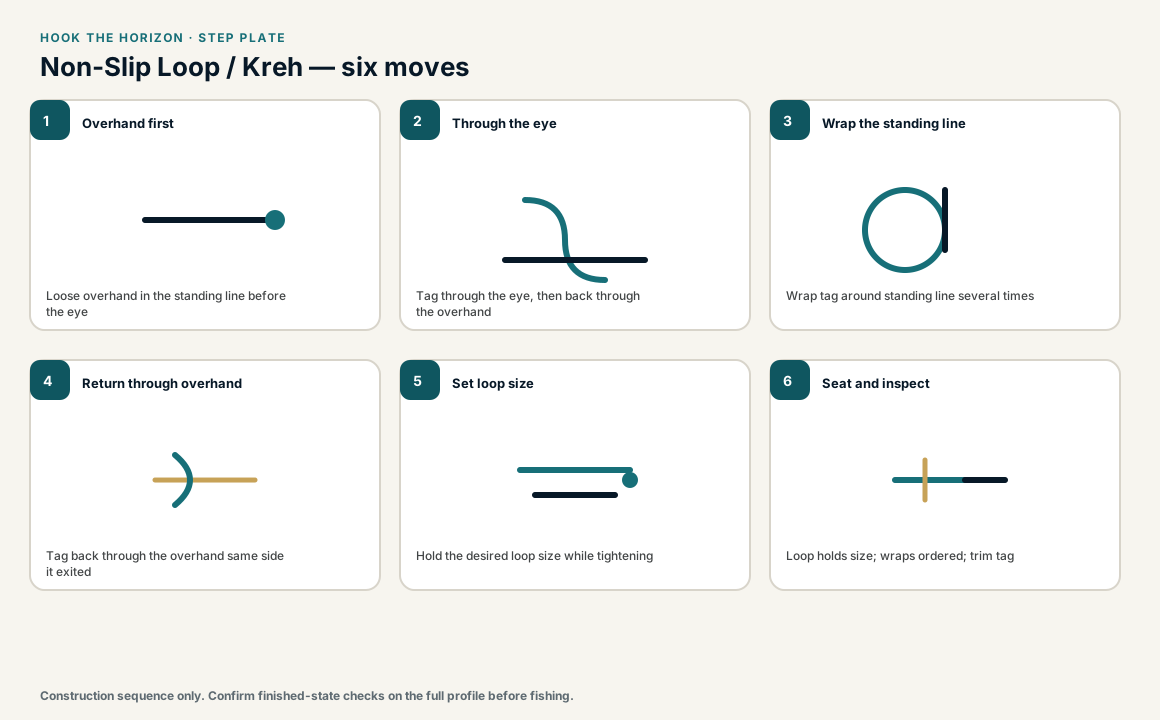
Tie a loose overhand knot in the line about 25 cm (10 in) from the end, then pass the tag end through the eye of the lure or hook.
You should now seeAn open overhand knot in the line, the lure hanging on the tag below it, and a long tag past the eye.
If it goes wrongPulling the overhand snug while handling the lure. A closed overhand will not let the tag back through at the next step.
Fix: Work the overhand open with a fingertip until the tag can pass through it easily.
Why: The overhand is where the tag enters twice, once at step 2 and again after the turns. It stays loose until the final pull draws it down against the turns.
- 1Back through the overhand2Loop to the lure
Move 1 of 1Bring the tag back through the overhand, the same way it came outYou should now see: The lure hanging in a loop below the overhand, with the tag coming out of the overhand beside the standing line. Step 02
Bring the tag end back through the loop of the overhand knot, so the lure hangs in a loop of line below it.
You should now seeThe lure hanging in a loop below the overhand, with the tag coming out of the overhand beside the standing line.
If it goes wrongRunning the tag past the overhand instead of through it. Nothing then holds the lure loop, and it slides shut on the eye.
Fix: Follow the tag from the eye with a finger. If it does not pass through the overhand, pull it back and thread it through.
Why: The overhand works as a collar. The tag passes through it here and again after the turns, so when the overhand closes it holds the tag at both ends of the turns.
- 1Five turns round the standing line
Move 1 of 1Wrap the tag round the standing line five times, working away from the overhandYou should now see: An even row of five turns on the standing line beside the overhand, with the tag end free at the far end. Step 03
Wrap the tag end around the standing line, working away from the overhand. Use about 5 turns on mid-weight line, up to 7 on light line and as few as 2 on very heavy line.
You should now seeAn even row of turns on the standing line above the overhand, with the tag end free at the far end of the row.
If it goes wrongTurns crossing over each other or bunching, seen as a lump in the row. On fine line it is also easy to lose count and wrap too few.
Fix: Unwind back to the overhand and wrap again, counting out loud and laying each turn beside the last.
Why: Stiff heavy line cannot close down around many turns, while thin light line needs more turns to build enough grip. That is why the count drops as line weight goes up.
- 1Back through the overhand
Move 1 of 2Pass the tag back through the overhand from the side it came out of Move 2 of 2Set the loop size, wet the knot, pull the tag, then pull loop and line apartYou should now see: A compact knot above an open loop of the size you set, the lure swinging freely, and a short tag. Step 04
Pass the tag back through the overhand from the side it came out of before. Set the loop size, wet the knot, pull the tag to snug the turns, then pull the loop and standing line apart and trim.
You should now seeA compact knot above an open loop of the size you set, the lure swinging freely in the loop, and a short tag.
If it goes wrongBringing the tag back through the overhand from the wrong side, or pulling the standing line hard before the turns are snug. The loop shrinks toward the eye as you tighten.
Fix: If the loop has closed or come out too small, cut the knot off and tie it again, setting the loop size while the turns are still loose.
Why: The loop size can only be changed while the turns are loose. NetKnots draws the turns together with a slow pull on the tag first, then seats the knot by pulling the loop and standing line apart.
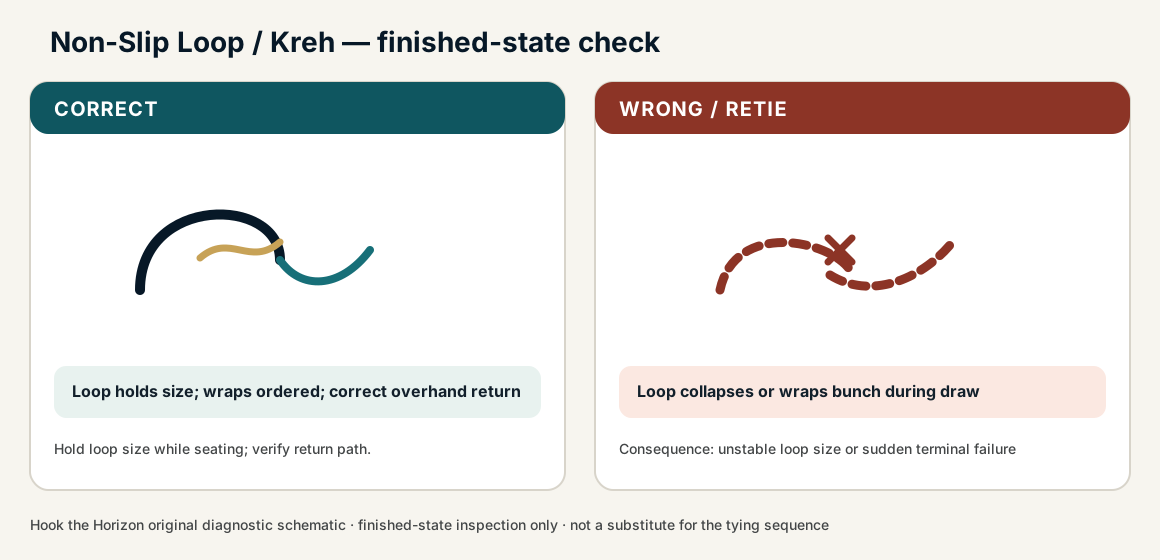
Non-Slip Mono Loop — finished-state checks, on the shared reference layout
Non-Slip Mono Loop — construction sequence
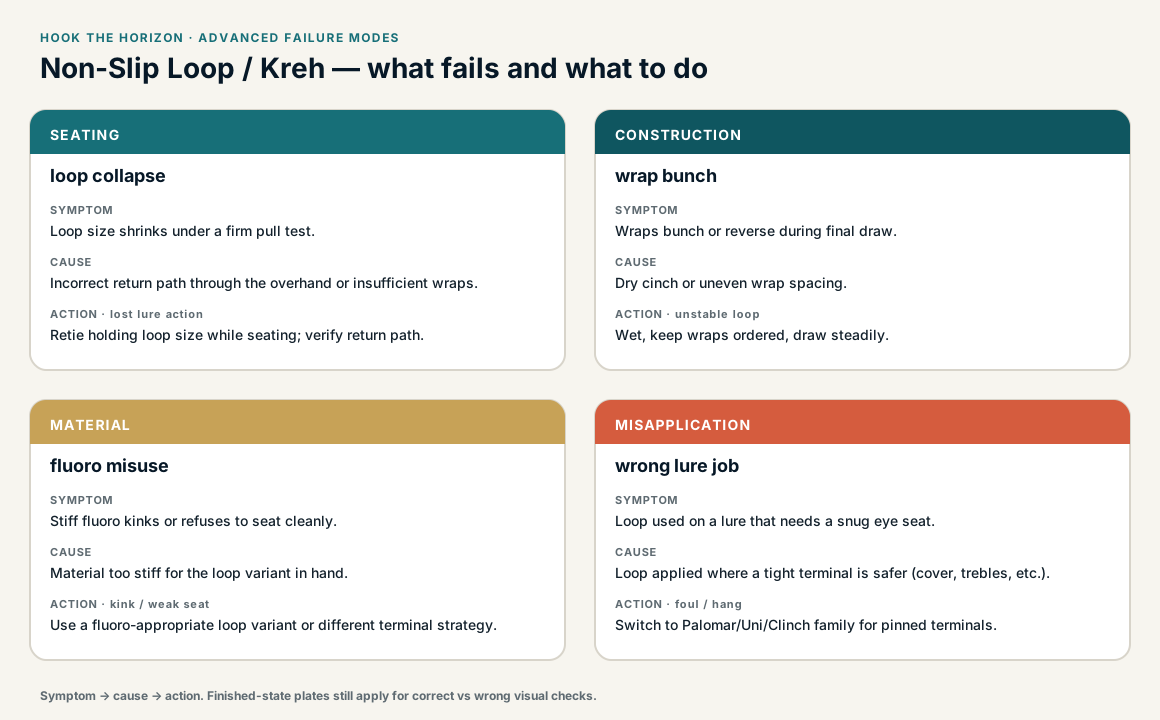
When this family fails, it fails as these. The recovered end still outranks the name.
Non-Slip Mono Loop — what fails and what to do
A loop that stays the size you made, with a return that cannot cinch.
- !Loop cinched around the hardware — action is dead
- !Return path reversed, so it becomes a slip loop
- !Fluoro in a lock that only behaves on mono
- !Tag brought back through the overhand from the wrong side
- !Tag not passed through the overhand, so the loop slides shut on the eye
- !Standing line pulled before the turns are snug, closing the loop toward the eye
- !Too few turns on light line to build enough grip
Too few wraps on light line
The loop walks down and becomes a noose
Wrap friction above the overhand is what holds loop size · step 03
Loop cinched closed while seating
Free-swing is gone and the noose can cut
Seat the wraps without shrinking the overhand loop · step 04
Tag missed the overhand
This is a slip loop, not a non-slip
The tag path through the overhand is the lock · step 02
Loop cinches closed
Check
- ?Loop holds under moderate pull
Then
- →Retie carefully
- →Compare to diagram
Loop size shrinks under a firm pull test.
Check
- ?Look for: Loop size shrinks under a firm pull test.
Then
- →Retie holding loop size while seating; verify return path.
Wraps bunch or reverse during final draw.
Check
- ?Look for: Wraps bunch or reverse during final draw.
Then
- →Wet, keep wraps ordered, draw steadily.
Stiff fluoro kinks or refuses to seat cleanly.
Check
- ?Look for: Stiff fluoro kinks or refuses to seat cleanly.
Then
- →Use a fluoro-appropriate loop variant or different terminal strategy.
Loop used on a lure that needs a snug eye seat.
Check
- ?Look for: Loop used on a lure that needs a snug eye seat.
Then
- →Switch to Palomar/Uni/Clinch family for pinned terminals.
Finished check failed — loop shrinks or collapses under a pull test
Check
- ?loop holds the intended size after seating
- ?wraps form cleanly around the standing line
- ?tag returns through the overhand from the same side it exited
Then
- →Retie. unstable loop size or sudden terminal failure.
Too few wraps on light line
Check
- ?The loop walks down and becomes a noose
- ?Inspect step 03
Then
- →Retie. Do not dress a defective structure and call it seated.
Loop cinched closed while seating
Check
- ?Free-swing is gone and the noose can cut
- ?Inspect step 04
Then
- →Retie. Do not dress a defective structure and call it seated.
Tag missed the overhand
Check
- ?This is a slip loop, not a non-slip
- ?Inspect step 02
Then
- →Retie. Do not dress a defective structure and call it seated.
Same failure class, different geometry. Open the plates — Diagnose still starts from the symptom.
Not ideal for
- ×Maximum slim fixed eye connections
- ×Maximum slim fixed-eye terminals — this loop is extra bulk