Yucatan Knot
Yucatán · Yucatan wrap
Joining a heavier mono leader to a lighter braid or mono main line that has first been doubled with a Bimini twist or spider hitch.
Line-to-line · Intermediate · Braid / Monofilament / Fluorocarbon · 4 steps
ApplicationsHow to tie itFinished structure
No drawing of this exact knot yet. The written steps are the reference.
- Diagram in reviewA drawing of the Yucatan Knot itself is being made. Until then, follow the written steps.
Step 01
Tie a double line in the main line with a Bimini twist or spider hitch, then lay the doubled main line and the end of the leader side by side so they overlap.
No drawing of this exact knot yet. The written steps are the reference.
You should now seeTwo strands of main line ending in a closed loop, lying alongside one strand of leader with a long overlap and plenty of leader tag.
If it goes wrongStarting with single main line, or with a double whose knot has slipped. You see one strand of main line against the leader instead of two.
Fix: Tie the Bimini twist or spider hitch first and give it a firm test pull before you lay it against the leader.
Why: The Yucatan is built from the double. Both legs wrap the leader together and the leader end later passes through the loop, so the same wraps in single line make a different, weaker join.
- Diagram in reviewA drawing of the Yucatan Knot itself is being made. Until then, follow the written steps.
Step 02
Wrap the doubled line around the leader with its two legs kept flat together: 4 to 6 turns if the main line is mono or fluorocarbon, 10 to 15 turns if it is braid.
No drawing of this exact knot yet. The written steps are the reference.
You should now seeAn even run of doubled-line turns on the leader, each pair lying beside the last, with the loop of the double still open past the last turn.
If it goes wrongTurns that cross or leave gaps, or the two legs of the double splitting apart. You see leader showing between turns or one leg riding over its partner.
Fix: Unwind to the last clean turn and wrap on from there, pinching the two legs together as you go.
Why: The turn count follows the main line, because slick braid needs more turns to grip than mono. As the knot is pulled up the leader rolls into a spiral around the double, so a gap left here becomes a loose spot in the finished knot.
- Diagram in reviewA drawing of the Yucatan Knot itself is being made. Until then, follow the written steps.
Step 03
Fold the leader tag back and pass it through the middle of the loop at the end of the doubled line, keeping the turns in place.
No drawing of this exact knot yet. The written steps are the reference.
You should now seeThe leader tag running back through the loop of the double, both legs of the loop visible around it, and the turns still in order.
If it goes wrongPassing the tag around one leg of the loop instead of through its middle, or letting the turns unwind while folding the tag. The join then hinges at the loop and does not close fully.
Fix: Take the tag back out, open the loop so both legs show, and pass the tag through the centre before any pull goes on.
Why: The loop closing around the leader tag is the lock. If the tag misses the loop, the turns can slide straight off the end of the leader.
- Diagram in reviewA drawing of the Yucatan Knot itself is being made. Until then, follow the written steps.
Step 04
Wet the knot and pull the doubled line and the leader slowly in opposite directions until the knot closes. Give it a hard test pull, then trim the leader tag close.
No drawing of this exact knot yet. The written steps are the reference.
You should now seeA compact join where the leader has rolled into a spiral around the double, with the main line and leader leaving the knot in a straight line.
If it goes wrongPulling on the leader tag or on one leg of the double. The knot closes crooked, with the lines leaving it at an angle and loose turns on one side.
Fix: If the knot is crooked or shows loose turns after the test pull, cut it off and tie it again, pulling only the doubled line against the leader.
Why: NetKnots notes that although the wraps are made with the doubled line, the leader wraps onto the doubled line as the knot tightens. A slow, even pull lets that change happen evenly.
Yucatan Knot — finished-state checks, on the shared reference layout
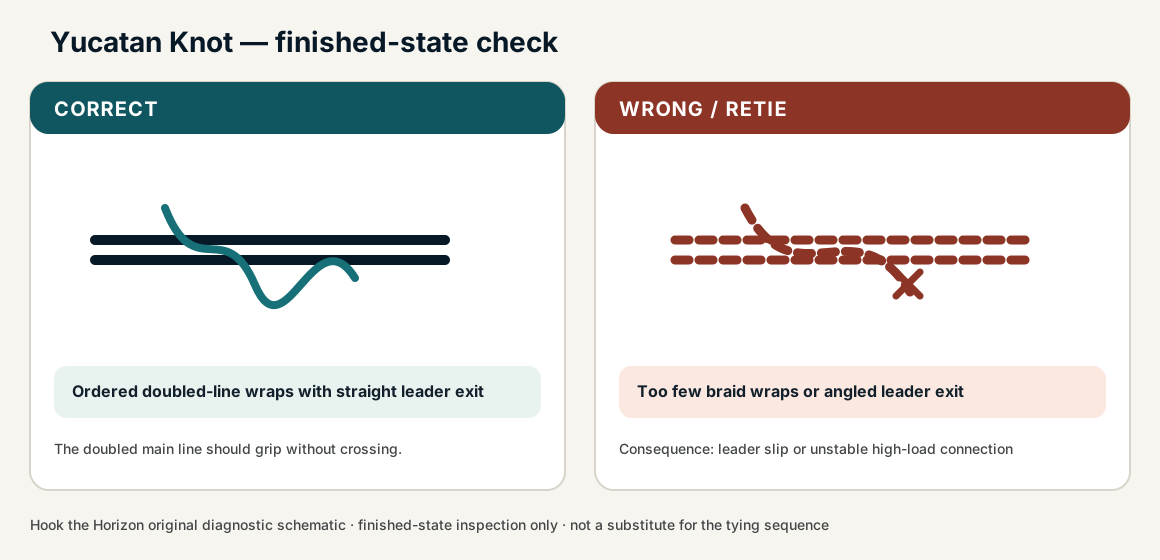
When this family fails, it fails as these. The recovered end still outranks the name.
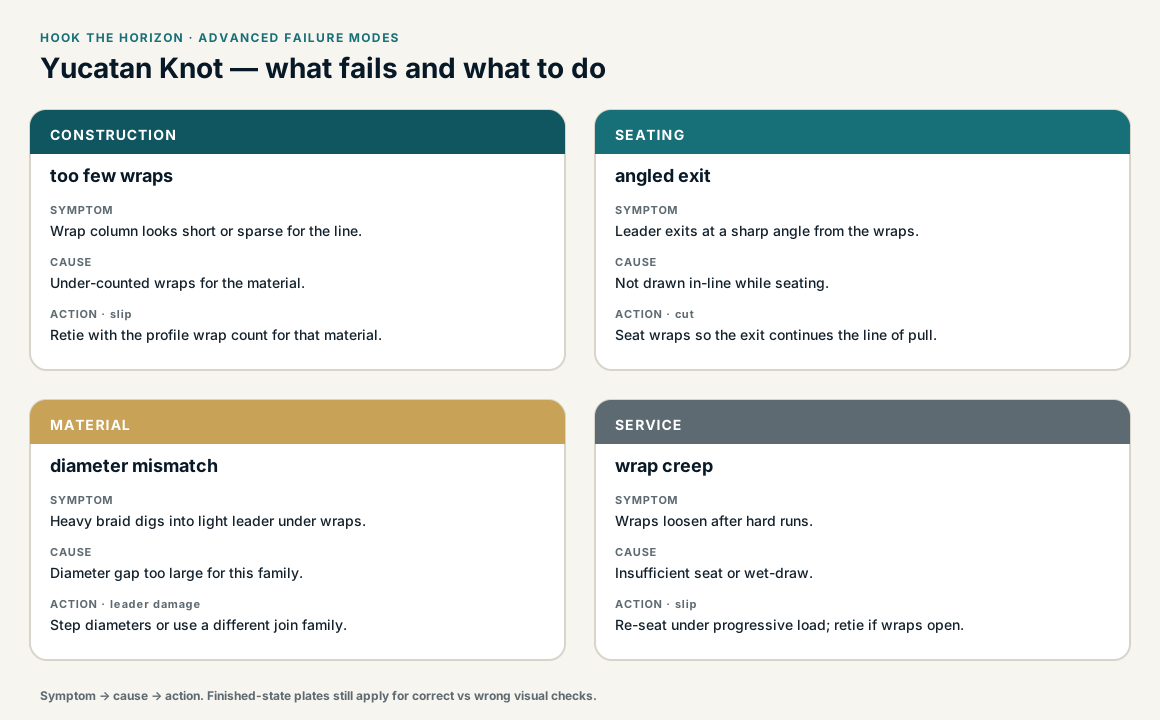
Yucatan Knot — what fails and what to do
Bight in the heavier leader; lighter line wraps the bight, then tucks.
- !Bight in the lighter line — the wraps have nothing to bite
- !Wraps walked off the bight instead of packed against the fold
- !Tag never tucked back through the bight, so the wraps dump
- !Leader tag misses the middle of the loop, so the turns can slide off the end of the leader
- !Pulled up on the leader tag or one leg of the double, closing crooked with loose turns
- !The Bimini twist or spider hitch forming the double has slipped
- !Too few turns for a braid main line, which needs more turns to grip
Doubled braid wraps gapped on the leader
Load concentrates; the wrap stack slips
Yucatan retention is distributed doubled-braid friction on the leader · step 02
Column left as a hinge — double never locked to the leader
Walks or dumps under shock
Hard opposing seat is the lock; an open Yucatan is unfinished · step 03
Lock never captured the wrap stack
Unlocks under cyclic load
The finish must capture the doubled wraps, not sit beside them · step 03
Double and leader not collinear
Hinge risk at the join
A Yucatan is an inline doubled-to-leader column · step 04
Connection hinges or walks under load
Check
- ?Inspect wrap density
- ?Pull-test before fishing
Then
- →Retie with more wraps
- →Verify Bimini/double integrity
- →Consider FG when guide passage is mandatory
Wrap column looks short or sparse for the line.
Check
- ?Look for: Wrap column looks short or sparse for the line.
Then
- →Retie with the profile wrap count for that material.
Leader exits at a sharp angle from the wraps.
Check
- ?Look for: Leader exits at a sharp angle from the wraps.
Then
- →Seat wraps so the exit continues the line of pull.
Heavy braid digs into light leader under wraps.
Check
- ?Look for: Heavy braid digs into light leader under wraps.
Then
- →Step diameters or use a different join family.
Wraps loosen after hard runs.
Check
- ?Look for: Wraps loosen after hard runs.
Then
- →Re-seat under progressive load; retie if wraps open.
Finished check failed — braid has too few wraps and can creep
Check
- ?doubled main-line wraps are tight and ordered
- ?leader exits back in line after seating
- ?wrap count matches material behavior
Then
- →Retie. leader slip or unstable high-load connection.
Doubled braid wraps gapped on the leader
Check
- ?Load concentrates; the wrap stack slips
- ?Inspect step 02
Then
- →Retie. Do not dress a defective structure and call it seated.
Column left as a hinge — double never locked to the leader
Check
- ?Walks or dumps under shock
- ?Inspect step 03
Then
- →Retie. Do not dress a defective structure and call it seated.
Lock never captured the wrap stack
Check
- ?Unlocks under cyclic load
- ?Inspect step 03
Then
- →Retie. Do not dress a defective structure and call it seated.
Same failure class, different geometry. Open the plates — Diagnose still starts from the symptom.
Not ideal for
- ×Single-line braid without a proper double
- ×Situations that demand the absolute slimmest guide passage (FG)