Alberto Knot
Alberto · Modified Albright
Joining braid to a monofilament or fluorocarbon leader, or two other lines of different diameter. The braid wraps out and back over a loop doubled in the leader.
Line-to-line · Intermediate · Braid / Monofilament / Fluorocarbon · 5 steps
ApplicationsHow to tie itLeader folded into a bight; braid wraps up the doubled section and back down over itself.
Finished structure
Leader folded into a bight; braid wraps up the doubled section and back down over itself.
step 01 · schematic Leader folded into a bight. Braid starts at the fold.
Step 01
Double the end of the leader back on itself to form a long loop, and pinch its two strands together near the open end.
Leader folded into a bight. Braid starts at the fold.
You should now seeA long, narrow loop in the leader with its two strands lying parallel and held together between finger and thumb.
If it goes wrongDoubling too little leader. The wraps in the next steps run past the leader's tag end, where there is only one strand left to wrap over.
Fix: Start again with more leader doubled back, so the doubled section is clearly longer than the wraps will cover.
Why: All the braid wraps go over the two strands of this loop. Pinching the strands together keeps the loop from twisting while the braid goes around it.
step 02 · schematic Wraps up the doubled leader.
Step 02
Push about 25 cm (10 in) of braid through the leader loop, then wrap the braid tag 7 times around both leader strands, working away from the loop end.
Wraps up the doubled leader.
You should now seeSeven tight wraps of braid lying side by side over both leader strands, running from the loop end toward the leader's standing line.
If it goes wrongLoose or crossed wraps, seen as braid wraps riding over each other or leader showing through gaps between them.
Fix: Unwind the braid back to the loop and wrap again, holding light tension on the braid tag so each wrap lands beside the last.
Why: These first wraps are the base layer. The return wraps in the next step go over them, so a gap or crossover left here gets buried and cannot be straightened later.
step 03 · schematic Wraps back down over the first layer.
Step 03
Wrap the braid tag back toward the loop 7 more times, laying each wrap over the first set.
Wraps back down over the first layer.
You should now seeA second layer of 7 wraps covering the first, with the braid tag arriving back beside the leader loop.
If it goes wrongStopping short or making a different number of wraps on the way back. The braid tag ends up away from the loop and cannot go back through it cleanly.
Fix: Count the return wraps out loud and finish all 7 before moving on. If the count is off, unwind the return layer and wrap it again.
Why: The return layer crosses over the first layer, which locks the braid onto the leader. Finishing beside the loop also puts the tag in position to go back through it.
step 04 · schematic Both tags trimmed; the taper should be smooth.
Step 04
Pass the braid tag back through the leader loop so it comes out the same way it went in. Wet the knot, hold the leader loop and pull the braid main line until the wraps close at the end of the loop.
Both tags trimmed; the taper should be smooth.
You should now seeA compact, tapered wrap body sitting at the closed end of the leader loop, with the braid and leader leaving it in a straight line.
If it goes wrongBringing the braid tag out of the loop the wrong way, or pulling only the braid tag. The wraps stall partway, bunch up, or the lines leave the knot at an angle.
Fix: If the tag went through the wrong way, back it out before pulling and thread it again. If the wraps have jammed out of place, cut it off and tie it again.
Why: The wraps slide up to where the leader bends back on itself and lock there. Pulling the main line rather than the tag closes the wraps evenly instead of dragging one end of the wrap body.
step 05 · schematic Both tags trimmed; the taper should be smooth.
Step 05
Give the join a hard test pull, braid against leader, then trim the leader tag and the braid tag close to the knot.
Both tags trimmed; the taper should be smooth.
You should now seeTwo short tags, one of leader and one of braid, and a wrap body that did not move along the leader during the test pull.
If it goes wrongTrimming before the test pull. An under-tightened Alberto can look finished, then creep along the leader the first time it is loaded hard.
Fix: Test before cutting anything. If the wraps slide or loosen under the pull, cut the knot off and tie it again.
Why: Cutting the leader tag close keeps it from catching in the rod guides. The test pull is the last check for a knot that will creep, before it is fished.
Alberto Knot — finished-state checks, on the shared reference layout
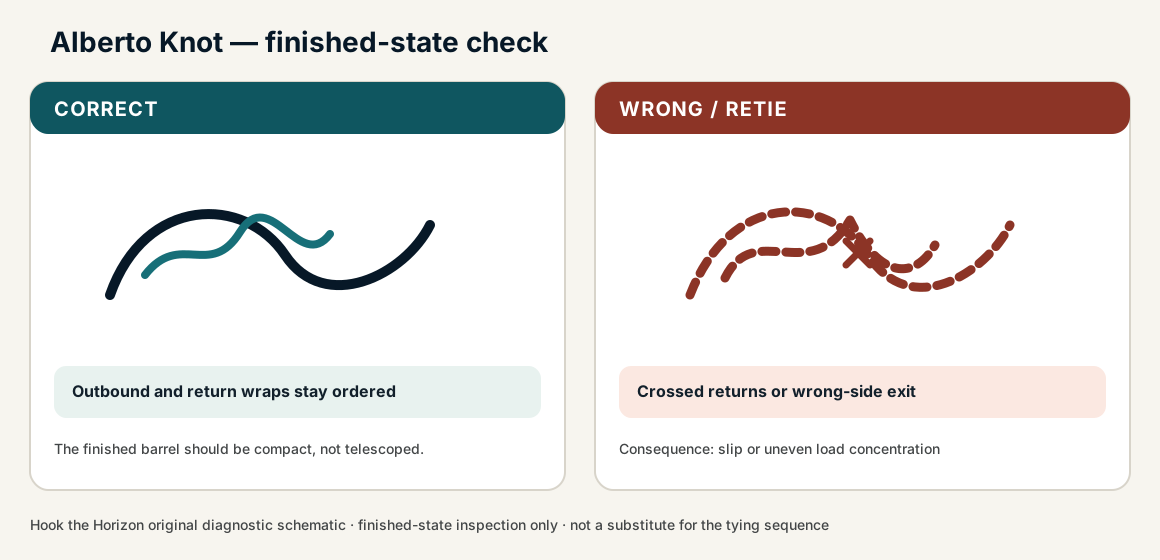
When this family fails, it fails as these. The recovered end still outranks the name.
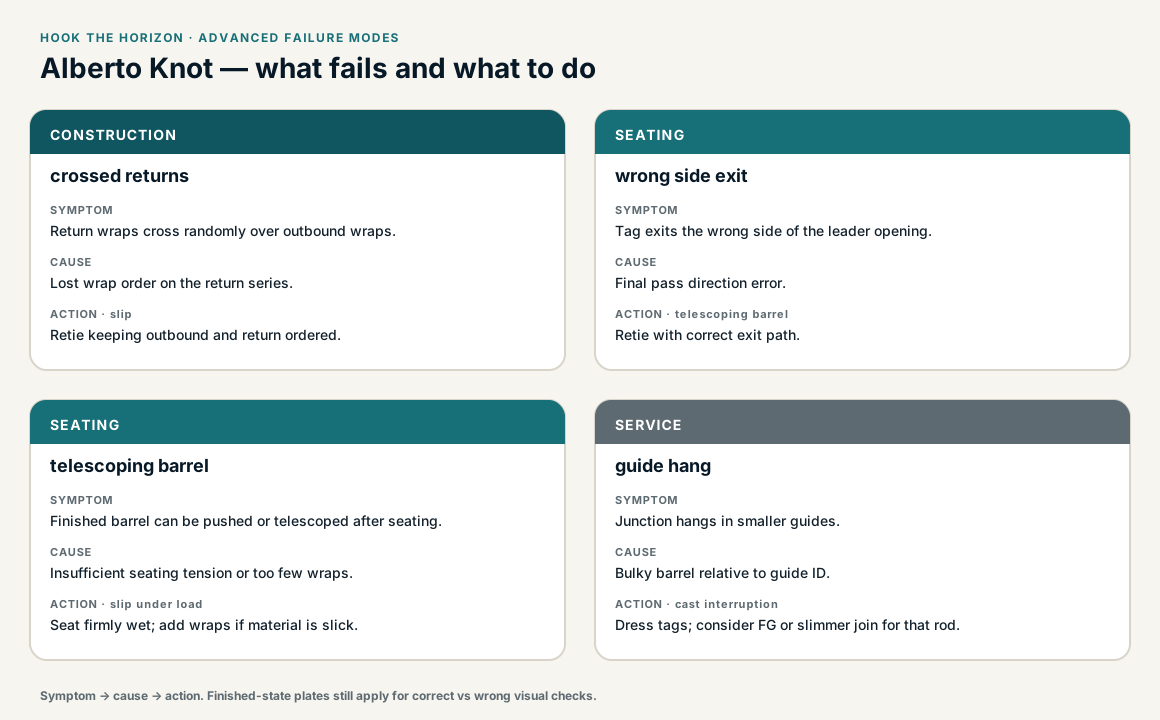
Alberto Knot — what fails and what to do
Braid wrapped onto a heavier leader, then locked so the join cannot hinge.
- !Hinge at the material transition — the join clicks, then parts
- !Wraps not packed on the heavier line before the lock
- !Lock or tag on the wrong side of the braid, so the column unzips
- !Pulled up too loosely, so the wraps creep along the leader the first time it is loaded hard
- !Braid tag exits the loop the wrong way, so the wraps stall and bunch
- !Seated dry, or by pulling the braid tag instead of the braid standing line
- !Wraps run past the leader tag onto a single leader strand
Gapped or bunched first-set wraps
The return cannot hide the gaps and the barrel pulls apart
Alberto grip is even braid friction on the doubled leader · step 02
Barrel left short of the leader bight
Walks on the first fish
A hard opposing seat is the lock; an open Alberto is unfinished · step 05
Re-entry in the wrong direction
Leaves a hinge instead of a locked barrel
The tag must re-enter the loop the same way it entered · step 04
Leader loop left as a hinge
The join clicks, then parts, under a hard run
Inline barrels, not a folded bight, carry Alberto load · step 04
Pulls apart at connection
Check
- ?Barrel should look compact and uniform
Then
- →Retie with tension
- →Consider FG after practice or Double Uni for speed
Return wraps cross randomly over outbound wraps.
Check
- ?Look for: Return wraps cross randomly over outbound wraps.
Then
- →Retie keeping outbound and return ordered.
Tag exits the wrong side of the leader opening.
Check
- ?Look for: Tag exits the wrong side of the leader opening.
Then
- →Retie with correct exit path.
Finished barrel can be pushed or telescoped after seating.
Check
- ?Look for: Finished barrel can be pushed or telescoped after seating.
Then
- →Seat firmly wet; add wraps if material is slick.
Junction hangs in smaller guides.
Check
- ?Look for: Junction hangs in smaller guides.
Then
- →Dress tags; consider FG or slimmer join for that rod.
Finished check failed — return wraps cross randomly over outbound wraps
Check
- ?outbound and return wraps stay ordered
- ?tag exits through the leader loop in the required direction
- ?finished barrel is compact without crossed braid
Then
- →Retie. slip or uneven load concentration.
Gapped or bunched first-set wraps
Check
- ?The return cannot hide the gaps and the barrel pulls apart
- ?Inspect step 02
Then
- →Retie. Do not dress a defective structure and call it seated.
Barrel left short of the leader bight
Check
- ?Walks on the first fish
- ?Inspect step 05
Then
- →Retie. Do not dress a defective structure and call it seated.
Re-entry in the wrong direction
Check
- ?Leaves a hinge instead of a locked barrel
- ?Inspect step 04
Then
- →Retie. Do not dress a defective structure and call it seated.
Same failure class, different geometry. Open the plates — Diagnose still starts from the symptom.
Not ideal for
- ×Absolute thinnest guide-friendly profile (FG wins)
- ×Two equal mono lines