Albright Special
Albright
Classic knot for joining lines of different diameters, including braid to mono and some fly-line style connections.
Line-to-line · Intermediate · Monofilament / Fluorocarbon / Braid / Fly line · 4 steps
ApplicationsHow to tie itFinished structure
Drawn from a rope model of this knot: which strand passes over which comes from where the rope actually lies.
- 1Bend of the loop2Lighter line's end
Move 1 of 1Fold the heavier line back on itself to make a long loopYou should now see: A long loop in the heavier line, with the lighter line lying alongside and its end beside the bend. Step 01
Bend the end of the heavier line back on itself to form a loop, and hold its two strands together.
You should now seeA loop in the heavier line with both strands lying side by side and the closed end of the loop pointing toward the lighter line.
If it goes wrongMaking the loop in the lighter line. The thick line cannot be wrapped tightly around a thin loop, and the join will not hold.
Fix: Swap the roles: the heavier line makes the loop and the lighter line does the wrapping.
Why: The join works because the thin line bites down onto the stiff, doubled heavy line, which is built for joins between lines of very different diameters.
- 1Up through the loop by the bend
Move 1 of 2Push the lighter line up through the loop by the bend and lay it along the loop 1Ten turns toward the bendMove 2 of 2Wind it back toward the bend, ten tight turns over itself and both legsYou should now see: Ten even turns over both legs of the loop and the lighter line's own run, stopping just short of the bend. Step 02
Push about 25 cm (10 in) of the lighter line through the loop, then wrap it back over itself and both strands of the loop 10 times, working toward the closed end of the loop.
You should now seeTen tight wraps lying side by side over the light line and both loop strands, ending near the closed end of the loop.
If it goes wrongWraps that cross, overlap or leave gaps, seen as a lumpy or uneven sleeve. It happens when the light line is not kept under tension between wraps.
Fix: Unwind the wraps and start again, pinching each wrap in place against the loop while you make the next.
Why: The wraps pin the light line's own tag against the heavy line, so the thin line grips along the whole length of the sleeve rather than at one point.
- 1Back through, same side
Move 1 of 1Pass the end back down through the loop beside where it came upYou should now see: The lighter line's end leaving the loop on the same side it came in, right beside its own standing part. Step 03
Pass the tag of the lighter line back through the loop, so it comes out on the same side of the loop that it went in.
You should now seeThe light-line tag and the light standing line both coming out of the loop on the same side, next to each other.
If it goes wrongBringing the tag out on the opposite side of the loop from where the light line entered. The two light-line strands then sit on different sides of the loop.
Fix: Pull the tag back out of the loop and pass it through again so it comes out beside the light standing line.
Why: NetKnots notes that you can wrap front to back or back to front with the same result, as long as the lines leave on the same side of the loop.
Move 1 of 2Wet it and pull both standing lines to seat the turns against the bend Move 2 of 2Trim both ends closeYou should now see: A tight block of turns against the bend of the loop, the two lines leaving it in a straight line, and two short ends. Step 04
Holding both heavy strands, slide the wraps to the closed end of the loop without pushing them off. Wet the knot, pull the light line's tag and standing line to tighten, and trim both tags.
You should now seeA tight sleeve of wraps sitting at the closed end of the loop, with the heavy line and light line leaving the knot in a straight line.
If it goes wrongSliding the wraps off the end of the loop, or tightening with the wraps still far from the closed end. The join bends at the knot or the wraps loosen when pulled.
Fix: If the wraps slid off the loop, pull the knot apart and tie it again. If they were tightened far from the closed end, cut it off and retie.
Why: Seated at the closed end, the wraps bear against the bend of the heavy line. Pulling both ends of the light line closes each wrap down evenly before the join takes load.
Albright Special — finished-state checks, on the shared reference layout
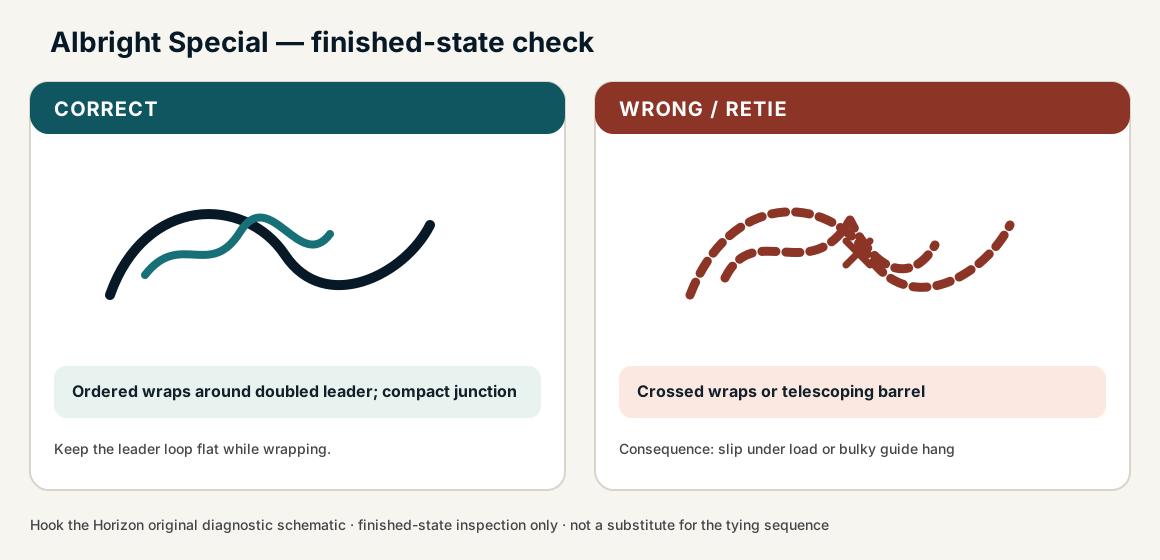
When this family fails, it fails as these. The recovered end still outranks the name.
Albright Special — what fails and what to do
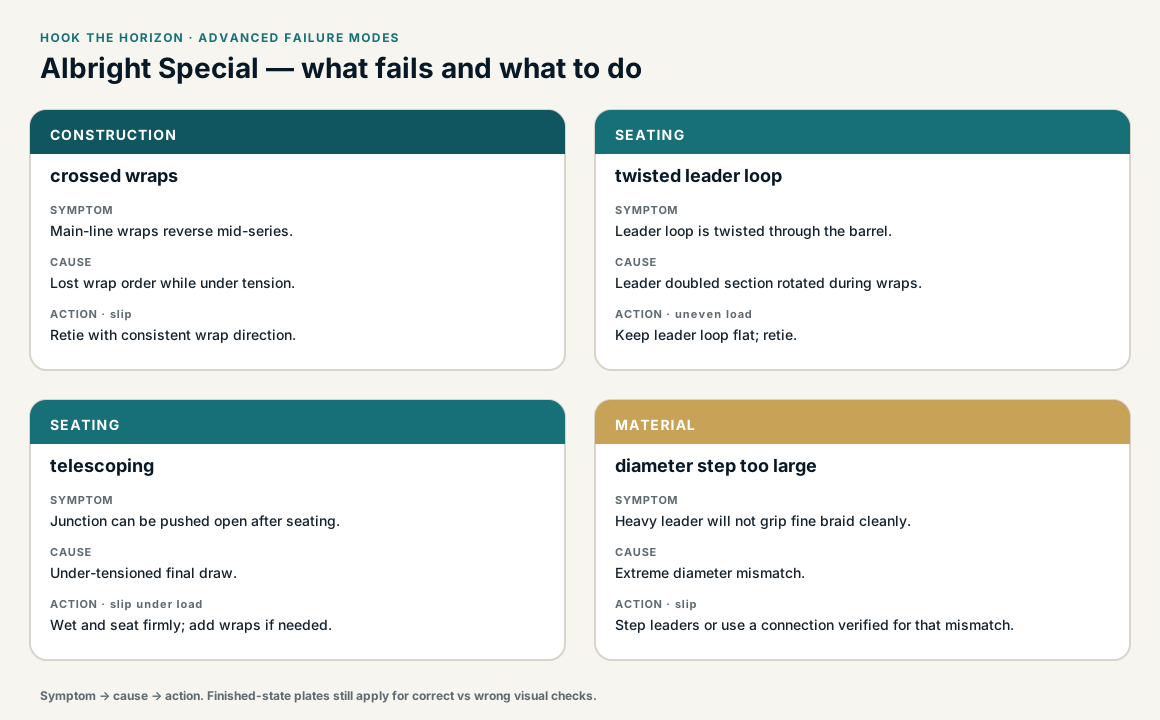
Bight in the heavier leader; lighter line wraps the bight, then tucks.
- !Bight in the lighter line — the wraps have nothing to bite
- !Wraps walked off the bight instead of packed against the fold
- !Tag never tucked back through the bight, so the wraps dump
- !Loop tied in the lighter line, so the thick line cannot wrap tightly and the join does not hold
- !Wraps tightened far from the closed end, so the join bends and the wraps loosen when pulled
- !Wraps slid off the end of the loop while seating
- !Only one end of the light line pulled to seat, so the wraps close unevenly
Lighter wraps gapped or crossed on the heavier loop
Weak join — load on one turn
Albright grip is even wraps on both legs of the heavier bight · step 02
Barrel never compressed onto the heavier loop
Pulls apart on the first hard run
The seat onto the heavier loop is the lock · step 04
Re-entry in the wrong direction
Structural failure — that is not an Albright
Re-entry direction is the knot, not a trim detail · step 03
Bulky asymmetric barrel left as a hinge
Guide tick, then a dumped join
A dressed Albright stays collinear; a hinge is unfinished · step 04
Bulky or hinges
Check
- ?Run through guides
Then
- →Neaten wraps
- →Consider FG for braid-leader slimness
Main-line wraps reverse mid-series.
Check
- ?Look for: Main-line wraps reverse mid-series.
Then
- →Retie with consistent wrap direction.
Leader loop is twisted through the barrel.
Check
- ?Look for: Leader loop is twisted through the barrel.
Then
- →Keep leader loop flat; retie.
Junction can be pushed open after seating.
Check
- ?Look for: Junction can be pushed open after seating.
Then
- →Wet and seat firmly; add wraps if needed.
Heavy leader will not grip fine braid cleanly.
Check
- ?Look for: Heavy leader will not grip fine braid cleanly.
Then
- →Step leaders or use a connection verified for that mismatch.
Finished check failed — wraps cross or reverse mid-series
Check
- ?main-line wraps stay ordered around the doubled leader
- ?tag exits cleanly after the wrap series
- ?finished junction is compact without telescoping
Then
- →Retie. slip under load or bulky guide hang.
Lighter wraps gapped or crossed on the heavier loop
Check
- ?Weak join — load on one turn
- ?Inspect step 02
Then
- →Retie. Do not dress a defective structure and call it seated.
Barrel never compressed onto the heavier loop
Check
- ?Pulls apart on the first hard run
- ?Inspect step 04
Then
- →Retie. Do not dress a defective structure and call it seated.
Re-entry in the wrong direction
Check
- ?Structural failure — that is not an Albright
- ?Inspect step 03
Then
- →Retie. Do not dress a defective structure and call it seated.
Same failure class, different geometry. Open the plates — Diagnose still starts from the symptom.
Not ideal for
- ×Equal-diameter mono joins (Blood or Double Uni may suit better)
- ×Guide-critical slim braid-to-leader where FG is the actual job