FG Knot
FG · Fine Grip
Joining a braid main line to a leader, such as fluorocarbon, with a slim, tapered join that runs through the rod guides.
Heavy leader straight; thin braid plaited over it as a sleeve; locking hitches at the end.
Finished structure
Heavy leader straight; thin braid plaited over it as a sleeve; locking hitches at the end.
step 01 · schematic Leader straight and under tension. Braid starts the plait.
Step 01
Put steady tension on the braid by pinning the main line so it cannot move, then lay the end of the leader across the braid at a shallow angle.
Leader straight and under tension. Braid starts the plait.
You should now seeA tight, straight braid with the leader crossing it close to the braid's tag end.
If it goes wrongLetting the braid go slack. Wraps laid on slack braid sit loose, and the knot slips the first time it is loaded.
Fix: Pin the braid again so it stays tight, then start the wraps over.
Why: The FG holds because tight braid bites into the leader, and that grip is set from the first wrap.
step 02 · schematic Alternating weaves, each snugged before the next.
Step 02
Wrap the braid tag around the leader, alternating over and under, until the woven section is about 1.5 to 2 cm long. Use more wraps on light line and fewer on heavy.
Alternating weaves, each snugged before the next.
You should now seeA tight woven section climbing the leader, each wrap snug against the last, with no leader showing between wraps.
If it goes wrongA skipped alternation or a loose wrap. The weave looks fine until the first hard pull, then slides.
Fix: Unwind back to the last tight pair of wraps and weave on from there.
Why: The length of the weave matters more than a wrap count, because the right count changes with line diameter.
step 03 · schematic Plait long and dense — no leader showing between weaves.
Step 03
Pinch where the lines meet so the weave cannot loosen, then tie 6 to 8 half hitches with the braid tag around both the leader and the braid.
Plait long and dense — no leader showing between weaves.
You should now seeA row of half hitches locking the top of the weave, with the weave still tight underneath.
If it goes wrongLetting go of the weave before the first hitches are on, so it spreads and loosens.
Fix: Push the wraps back together by hand before adding hitches. If the weave has opened up, weave it again.
Why: The hitches stop the weave from creeping. Without them the knot slips on the first hard pull.
step 04 · schematic Locking hitches, then a finish hitch.
Step 04
Pull the braid and the leader hard in opposite directions. Trim the leader tag close, then tie 3 or 4 half hitches with the braid tag around the braid and trim it.
Locking hitches, then a finish hitch.
You should now seeA slim, tapered join, the leader tag cut close, and a short row of hitches on the braid above the weave.
If it goes wrongCutting tags before the hard pull, so a weave that would have slipped goes out on the water.
Fix: Pull hard before you trim anything. If the weave moves, cut it off and tie the knot again.
Why: The last hitches are braid around braid, which gives the join a smooth end to pass through the guides.
FG Knot — finished-state checks, on the shared reference layout
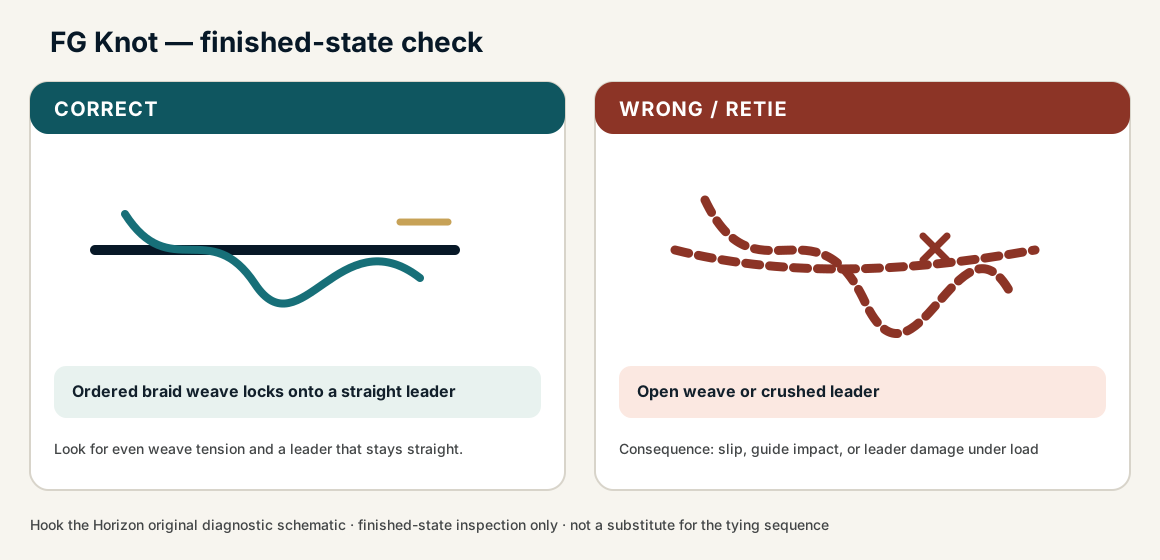
When this family fails, it fails as these. The recovered end still outranks the name.
FG Knot — what fails and what to do
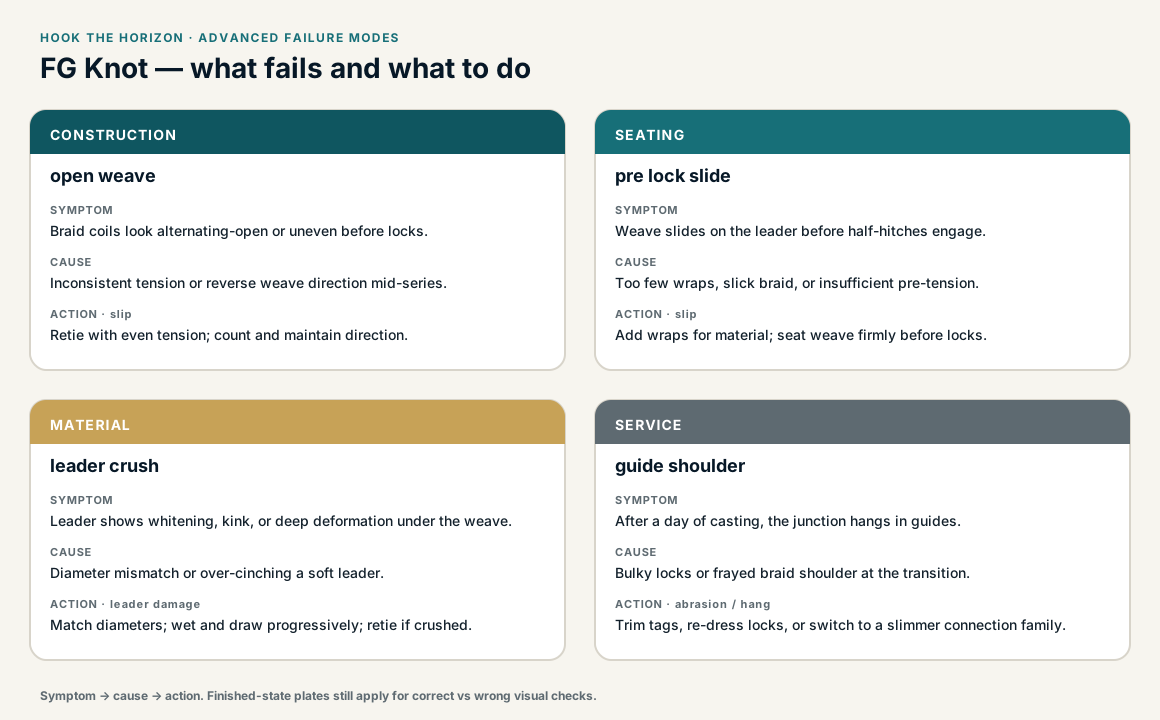
Braid wrapped onto a heavier leader, then locked so the join cannot hinge.
- !Hinge at the material transition — the join clicks, then parts
- !Wraps not packed on the heavier line before the lock
- !Lock or tag on the wrong side of the braid, so the column unzips
- !Braid slack while the wraps were laid
- !A skipped alternation or loose wrap in the weave
- !Weave not locked with half hitches
- !No hard final pull to tighten the weave before fishing
Crossed lower FG wraps
Load concentrates and the weave slips off the leader
FG is distributed braid compression, not a barrel you can bunch · step 02
Weave left loose — uncompressed leader will dump
Catastrophic slip under load
Incomplete seating leaves the leader uncompressed · step 04
Lock hitches missing or walking
Unlock under cyclic casting load
The finish hitches stop the weave from walking · step 03
Leader exits off-axis through the jacket
Uneven compression; hinge risk
Braid must jacket the leader on-axis · step 02
Braid slides off leader
Check
- ?Inspect for gaps in the weave
- ?Pull-test before fishing
Then
- →Retie under firm leader tension
- →Add wraps
- →Practice on the dock, not in a fish fight
Cannot keep wraps neat
Check
- ?Try with heavier practice braid first
Then
- →Use Alberto or Double Uni until FG is reliable
- →Build muscle memory with 20 practice reps
Braid coils look alternating-open or uneven before locks.
Check
- ?Look for: Braid coils look alternating-open or uneven before locks.
Then
- →Retie with even tension; count and maintain direction.
Weave slides on the leader before half-hitches engage.
Check
- ?Look for: Weave slides on the leader before half-hitches engage.
Then
- →Add wraps for material; seat weave firmly before locks.
Leader shows whitening, kink, or deep deformation under the weave.
Check
- ?Look for: Leader shows whitening, kink, or deep deformation under the weave.
Then
- →Match diameters; wet and draw progressively; retie if crushed.
After a day of casting, the junction hangs in guides.
Check
- ?Look for: After a day of casting, the junction hangs in guides.
Then
- →Trim tags, re-dress locks, or switch to a slimmer connection family.
Finished check failed — loose or alternating-open braid coils
Check
- ?braid weave is evenly tensioned around a straight leader
- ?locking half-hitches are compact and do not walk
- ?leader is not visibly crushed or kinked
Then
- →Retie. slip, guide impact, or leader damage under load.
Crossed lower FG wraps
Check
- ?Load concentrates and the weave slips off the leader
- ?Inspect step 02
Then
- →Retie. Do not dress a defective structure and call it seated.
Weave left loose — uncompressed leader will dump
Check
- ?Catastrophic slip under load
- ?Inspect step 04
Then
- →Retie. Do not dress a defective structure and call it seated.
Lock hitches missing or walking
Check
- ?Unlock under cyclic casting load
- ?Inspect step 03
Then
- →Retie. Do not dress a defective structure and call it seated.
Same failure class, different geometry. Open the plates — Diagnose still starts from the symptom.
Not ideal for
- ×Beginners needing a fast re-tie in wind
- ×Joining two similar mono lines (use Double Uni or Blood)