Double Uni Knot
Double Uni · Uni to Uni
Reliable way to join two lines of similar or moderately different diameters. Works for mono-to-mono, fluoro-to-mono, and many braid-to-leader pairings when wrap counts are adjusted.
Finished structure
Drawn from a rope model of this knot: which strand passes over which comes from where the rope actually lies.
- 1First line's tag end2Second line's tag end
Move 1 of 1Lay the two line ends side by side, overlapping, tags pointing opposite waysYou should now see: Two lines lying parallel along the overlap, each tag reaching past the other line's end of the overlap with length to spare. Step 01
Lay the ends of the two lines side by side, tags pointing in opposite directions, so they overlap by at least 15 cm (6 in).
You should now seeTwo lines lying parallel along the overlap, each tag reaching past the other line's end of the overlap with length to spare.
If it goes wrongToo short an overlap. It shows during the second uni, when the tag runs out before the turns are finished.
Fix: Separate the lines and lay them out again with more overlap before tying anything.
Why: Each tag has to make a complete uni knot around the other line, so the overlap supplies the working length for two knots.
- 1Five turns round both lines
Move 1 of 2Double the first tag back into a loop and wrap both lines five times through it Move 2 of 2Pull that tag to close the turns into a barrelYou should now see: One closed barrel of even turns on the overlap, still able to slide along the other line when pushed. Step 02
Double one tag back into a loop over both lines, wrap it around both lines and through the loop 5 or 6 times, or 6 to 8 times for braid, then pull that tag to close the turns.
You should now seeOne closed barrel of even turns on the overlap, still able to slide along the other line when pushed.
If it goes wrongTurns crossing each other or going around only one line, seen as a lumpy barrel. It happens most with slick braid when the loop twists during wrapping.
Fix: Unwind the tag to the loop and wrap again with the loop held flat, keeping each turn beside the last and around both lines.
Why: Braid is slippery and needs more turns to grip than mono. For a braid-to-mono join NetKnots gives 6 to 8 turns with the braid and 5 or more with the mono.
- 1First barrel2Second barrel
Move 1 of 1Tie a second uni with the other tag, facing the opposite wayYou should now see: Two closed barrels on the overlap, mirror images of each other, with a stretch of line still between them. Step 03
With the other tag, tie a second uni the same way facing the opposite direction: loop, wrap around both lines and through the loop, then pull its tag to close the turns.
You should now seeTwo closed barrels on the overlap, mirror images of each other, with a stretch of line still between them.
If it goes wrongGiving this uni fewer turns than it needs. On a braid-to-mono join, the side with too few turns is the side that slips when loaded.
Fix: If the count is short, open this second barrel and wrap it again with the full count before sliding anything.
Why: Each uni is a noose on its own line that closes around the other line. The join holds only as well as the weaker of the two, so the slicker or thinner line needs its full count.
Move 1 of 1Wet both knots and pull the two standing lines until the barrels meetYou should now see: The two barrels touching end to end with no gap, and both standing lines leaving the join in a straight line. Step 04
Wet both knots and slowly pull the two standing lines in opposite directions until the barrels slide together and press firmly against each other.
You should now seeThe two barrels touching end to end with no gap, and both standing lines leaving the join in a straight line.
If it goes wrongStopping while a gap remains between the barrels, or pulling a tag instead of a standing line. The join bends at the gap and the lines leave it at an angle.
Fix: Wet the join and keep pulling the standing lines apart until the barrels meet. If a barrel has opened up, cut the join out and tie it again.
Why: Fishtrack stresses snugging the two knots tightly against each other. Butted barrels support each other under load, while a gap leaves a spot where the join can fold.
Move 1 of 1Test the join with a firm pull, then trim both tags shortYou should now see: A compact join with two short tag stubs, and barrels that stayed pressed together through the test pull. Step 05
Give the join a firm test pull on both standing lines, then trim both tags close to their barrels, leaving a short stub on each.
You should now seeA compact join with two short tag stubs, and barrels that stayed pressed together through the test pull.
If it goes wrongTrimming before the test pull, or cutting so flush that a tag slips back inside its barrel as the knot settles.
Fix: If a tag has pulled inside its barrel or the barrels moved apart on the test pull, cut the join out and tie it again.
Why: A short stub gives the tag room to draw in slightly as the barrels settle under load. A tag cut flush has no margin and can pull through.
Double Uni Knot — construction sequence
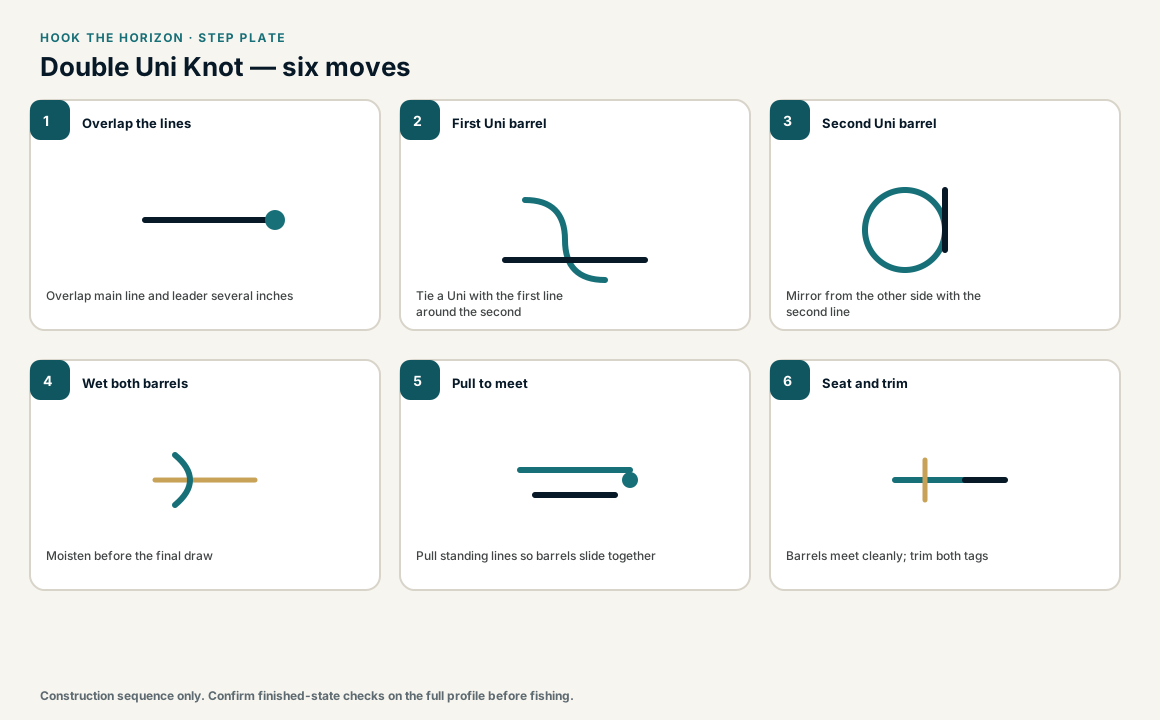
When this family fails, it fails as these. The recovered end still outranks the name.
Double Uni Knot — what fails and what to do
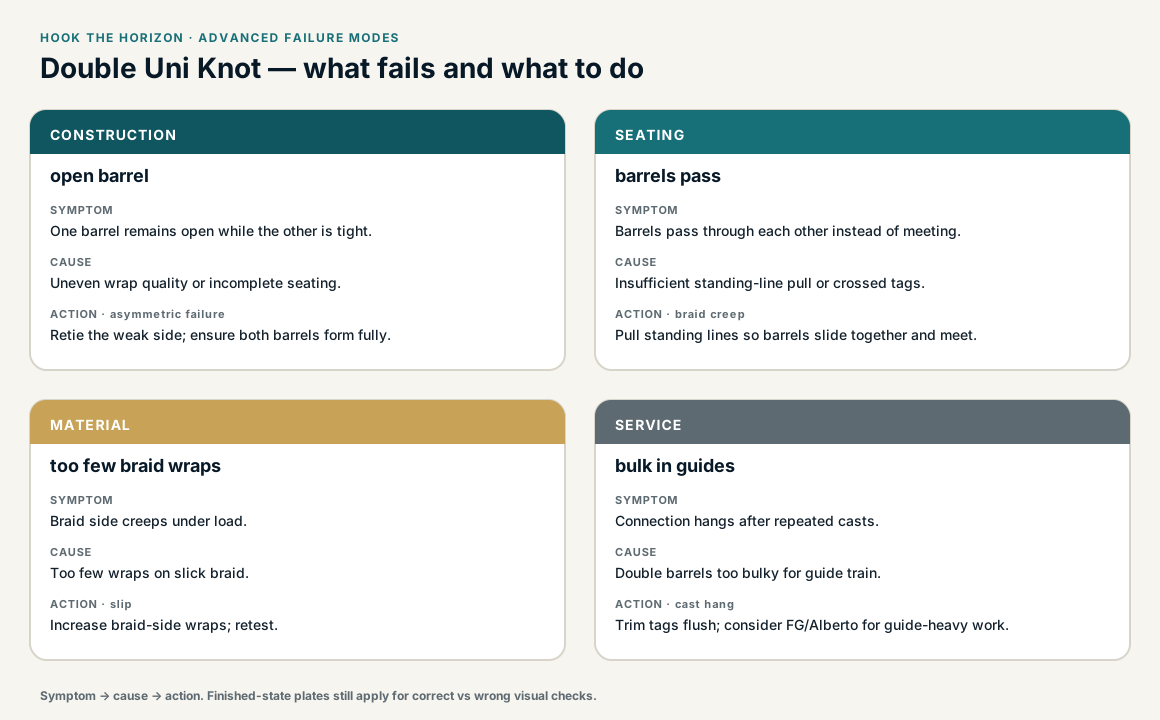
A barrel that is formed, then slid to the eye or the other barrel.
- !Barrel locked short of the eye or the other Uni
- !Crossed wraps in the barrel
- !Tag buried back into the barrel instead of exiting
- !Braid side tied with too few turns
- !Gap left between the barrels, so the join folds at the gap
- !Tag trimmed flush and pulled back inside its barrel
Crossed wraps in one Uni barrel
That side slips and the join dumps
Each Uni needs parallel wraps; one bad barrel fails the pair · step 02
Barrels never butted
The join separates under load
Double Uni locks when the two barrels meet and seat together · step 04
Tag buried in a barrel instead of exiting
That barrel unravels
Each tag must exit after its barrel is formed · step 05
Barrels not collinear — a hinge join
Clicks in the guides, then parts
Inline barrels, not a folded pair, carry Double Uni load · step 04
Two Uni knots separate under load
Check
- ?Confirm barrels touch
- ?Count wraps on each side
Then
- →Retie and seat until barrels butt
- →Add wraps on braid side
Too bulky for guides
Check
- ?Pass through rod tip slowly
Then
- →Use FG or Alberto for braid-to-leader slimness
- →Reduce unnecessary wraps
One barrel remains open while the other is tight.
Check
- ?Look for: One barrel remains open while the other is tight.
Then
- →Retie the weak side; ensure both barrels form fully.
Barrels pass through each other instead of meeting.
Check
- ?Look for: Barrels pass through each other instead of meeting.
Then
- →Pull standing lines so barrels slide together and meet.
Braid side creeps under load.
Check
- ?Look for: Braid side creeps under load.
Then
- →Increase braid-side wraps; retest.
Connection hangs after repeated casts.
Check
- ?Look for: Connection hangs after repeated casts.
Then
- →Trim tags flush; consider FG/Alberto for guide-heavy work.
Finished check failed — one barrel remains open while the other is tight
Check
- ?two barrels seat against each other cleanly
- ?braid side has enough wraps for the material
- ?no tag movement appears under a hard pull test
Then
- →Retie. braid creep or asymmetric failure.
Crossed wraps in one Uni barrel
Check
- ?That side slips and the join dumps
- ?Inspect step 02
Then
- →Retie. Do not dress a defective structure and call it seated.
Barrels never butted
Check
- ?The join separates under load
- ?Inspect step 04
Then
- →Retie. Do not dress a defective structure and call it seated.
Tag buried in a barrel instead of exiting
Check
- ?That barrel unravels
- ?Inspect step 05
Then
- →Retie. Do not dress a defective structure and call it seated.
Same failure class, different geometry. Open the plates — Diagnose still starts from the symptom.
Not ideal for
- ×Extreme diameter mismatches
- ×Ultra-slim braid-to-leader profiles (consider FG)