Spider Hitch
Fast doubled-line hitch. Practical alternative to Bimini when time is short; inspect under load before trusting big fish.
Intermediate · Monofilament / Fluorocarbon / Braid
Connection card
Spider Hitch
For line → loop (fixed end loop), double line → leader.
This card does not say how strong the knot is. A retention figure comes from a bench, in one material, at one diameter, tied by somebody who ties it all day — and the line in your hand is none of those. What it does tell you is whether the thing you have just tied is the thing the record describes.
What this plate is telling you
Fast doubled-line hitch. Practical alternative to Bimini when time is short; inspect under load before trusting big fish.
Save this as a picture and it works with a dead signal and a nearly dead battery, which is when a joint is most often tied badly. The rest of this page — the steps, the seating sequence, the failure modes and the bench — is for the evening before.
Before you start
- ·NetKnots notes it is not considered as durable as a Bimini but is much faster and easier to tie.
- ·Take 5 wraps around your thumb with mono, or 15 with braid, which is slicker.
- ·Double more line than you want in the finished double. The small loop and the wraps use some of it.
- ·Give the finished hitch a hard pull against the standing line before fishing it.
Step 1 of 4. Double a length of line to make a long loop, and hold the standing line and tag together so the loop end hangs free.
No drawing of this exact knot yet. The written steps are the reference.
swipe to step
01
Double a length of line to make a long loop, and hold the standing line and tag together so the loop end hangs free.
A long double with its loop end free and the standing line and tag pinched side by side where the double starts.
Doubling too little line. There is not enough double to form the small loop, take the wraps, and still leave the double you wanted.
Fix: Let go and double more line before you start the small loop.
Why: Everything after this is tied with the two strands of the double handled as one line, so keep them side by side and untwisted.
arrow keys work
Tying procedure — Spider Hitch
- Diagram in reviewA drawing of the Spider Hitch itself is being made. Until then, follow the written steps.
Step 01 / 4
Double a length of line to make a long loop, and hold the standing line and tag together so the loop end hangs free.
You should now see: A long double with its loop end free and the standing line and tag pinched side by side where the double starts.
If it goes wrong: Doubling too little line. There is not enough double to form the small loop, take the wraps, and still leave the double you wanted.
Fix: Let go and double more line before you start the small loop.
Why: Everything after this is tied with the two strands of the double handled as one line, so keep them side by side and untwisted.
- Diagram in reviewA drawing of the Spider Hitch itself is being made. Until then, follow the written steps.
Step 02 / 4
Twist a small loop into the doubled line and pinch it between thumb and forefinger. Wrap the double around your thumb and the small loop 5 times, or 15 times with braid.
You should now see: A row of side-by-side wraps of doubled line around your thumb and the small loop, with the loop end of the double hanging past your thumb.
If it goes wrong: Too few wraps, or wraps that cross over each other on the thumb. You see a turn riding on top of another, or fewer turns than the count.
Fix: Unwind back to the last clean wrap, lay the rest down side by side, and count them again.
Why: The wraps come off the thumb one at a time in step 3, which only works if they lie in order. Braid is slicker than mono, which is why its count is higher.
If wrong: Under-wrapped or messy hitch column — Weak double you cannot trust on a fish.
- Diagram in reviewA drawing of the Spider Hitch itself is being made. Until then, follow the written steps.
Step 03 / 4
Pass the loop end of the double through the small loop, then pull the double slowly so the wraps unwind off your thumb one at a time.
You should now see: The wraps leaving your thumb in order and settling around the small loop in a neat column, with the long loop coming out through it.
If it goes wrong: Pulling fast, or taking the double around the small loop instead of through it. The wraps jump off the thumb together and tangle, or the hitch falls apart when released.
Fix: If the wraps tangle or the double is not through the small loop, pull it all apart and start again from step 2.
Why: The wraps move from lying on your thumb to lying on the small loop. Coming off in order is what keeps the column neat.
If wrong: Hitch column unravels — double is gone — The doubled section fails.
If wrong: Bight never completed the hitch pass-through — Unreliable lock.
- Diagram in reviewA drawing of the Spider Hitch itself is being made. Until then, follow the written steps.
Step 04 / 4
Wet the hitch and pull all four strands evenly, the two legs of the double against the standing line and tag, until the wraps close tight. Trim the tag.
You should now see: A tight, even column of wraps where the double starts, and a double that stays closed when you pull it hard against the standing line.
If it goes wrong: Pulling only one leg of the double, or stopping before the wraps close. The column looks loose or lumpy and the double can slide open under a test pull.
Fix: Wet it and pull all four strands evenly again. If the column still moves under a hard test pull, cut it off and tie it again.
Why: NetKnots notes that the spider hitch is not considered as durable as a Bimini twist but is much faster and easier to tie, so give it a hard pull before fishing it.
Watch the tie
Easiest Way To Tie A Spider Hitch Loop KnotSalt Strong · Opens on YouTubeExternal video from a creator we follow — not produced by us. Nothing on this page loads from YouTube until you follow the link.
Seating sequence — where failures are born
The step list compresses the finish. Run these phases in order, one at a time.
01 Moisten
Wet the structure before any load reaches it.
Zero. Nothing tightens yet.
02 Load
Take up slack slowly until the wraps begin to gather.
Light and even — both ends moving together.
03 Dress
Watch the wraps stack in order; stop and back off if any cross.
Hold, do not pull. Correction happens here or not at all.
04 Set
One continuous pull to full seat — no sawing, no jerks.
Firm, single direction, standing line against the terminal end.
05 Trim
Cut the tag square, leaving a short stub proud of the knot.
None. Never trim under load.
Finished structure — what correct looks like
No drawing of this exact knot yet. The written steps are the reference.
- ·Doubled section held by a tight hitch column
- ·Hitch locked under tension
- ·N/A or short if a separate tag exists
- ·Even hitch wraps
Verify before you load it
Every line is pass or fail. One fail means retie — do not load a knot you argued with.
- 01Doubled section held by a tight hitch column
- 02Hitch locked under tension
- 03N/A or short if a separate tag exists
- 04Even hitch wraps
- 05No loose unravelling
- 06Spider hitch
Field notes — dark, cold, gloves
- ·Retie by feel first, light second — the seat is a tactile event, not a visual one.
- ·Gloves off for the dress phase. Fabric hides a crossing wrap.
- ·Wrong twice in a row means the material or the hardware is fighting you. Change one, not your technique.
Spider Hitch — finished-state checks, on the shared reference layout
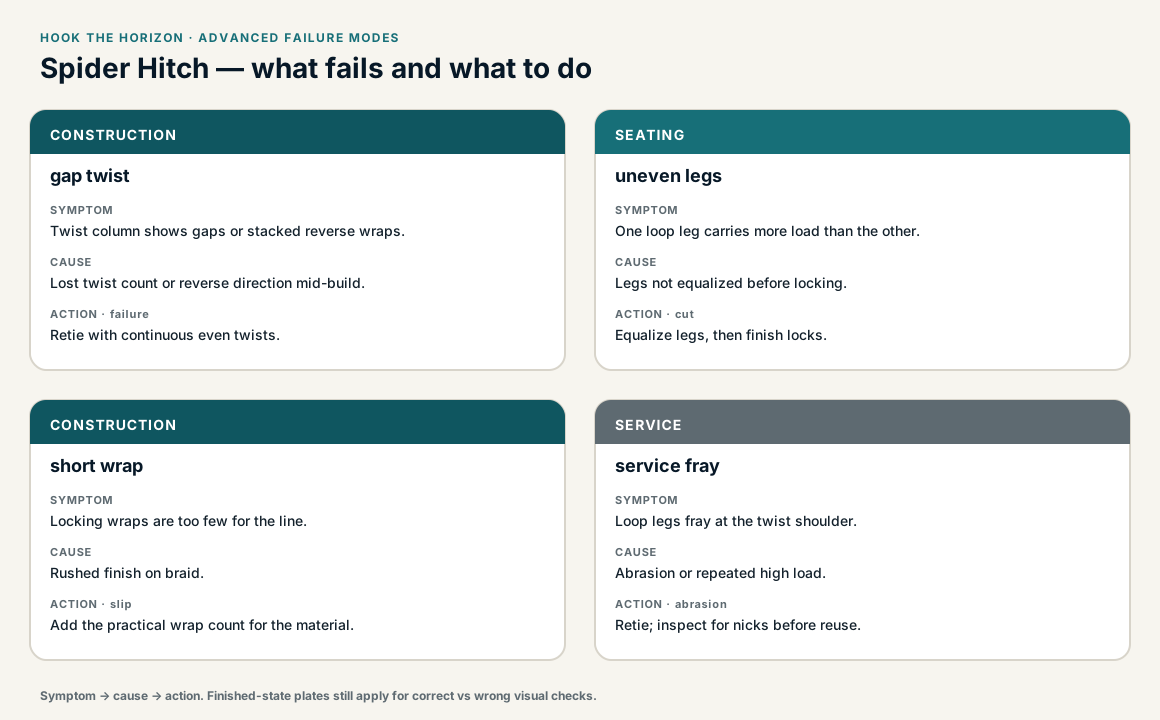
When this family fails, it fails as these. The recovered end still outranks the name.
Spider Hitch — what fails and what to do
A load-bearing loop of doubled line, locked so it cannot crawl back.
- !Twists or wraps not packed before the lock
- !Lock that crawls back into the double
- !Uneven legs — one side takes the shock
- !Double taken around the small loop instead of through it, so the hitch falls apart
- !Wraps crossed on the thumb or pulled off together, so they tangle
- !Wraps not closed tight on all four strands, so the double slides open under a hard pull
- !Braid tied with only the 5 wraps given for mono
Hitch column unravels — double is gone
The doubled section fails
Wrap friction under tension holds the Spider; a collapse is a retie · step 03
Under-wrapped or messy hitch column
Weak double you cannot trust on a fish
Even wrap count is the Spider; too few wraps is a different hitch · step 02
Bight never completed the hitch pass-through
Unreliable lock
The loop must complete the hitch before you load the double · step 03
Double unravels or shortens under load
Check
- ?Wrap count
- ?Hitch column density
Then
- →Retie with more wraps
- →Build a Bimini when time allows
Twist column shows gaps or stacked reverse wraps.
Check
- ?Look for: Twist column shows gaps or stacked reverse wraps.
Then
- →Retie with continuous even twists.
One loop leg carries more load than the other.
Check
- ?Look for: One loop leg carries more load than the other.
Then
- →Equalize legs, then finish locks.
Locking wraps are too few for the line.
Check
- ?Look for: Locking wraps are too few for the line.
Then
- →Add the practical wrap count for the material.
Loop legs fray at the twist shoulder.
Check
- ?Look for: Loop legs fray at the twist shoulder.
Then
- →Retie; inspect for nicks before reuse.
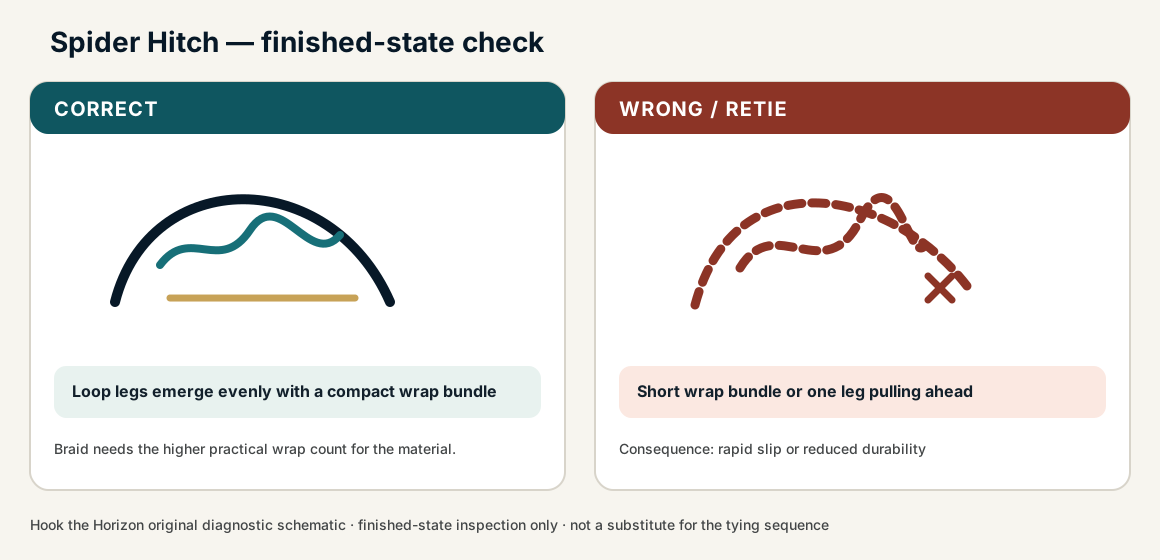
Finished check failed — short wrap bundle in slick braid
Check
- ?loop legs emerge evenly
- ?wrap bundle is compact
- ?braid uses the higher practical wrap count required by the material
Then
- →Retie. rapid slip or reduced durability.
Hitch column unravels — double is gone
Check
- ?The doubled section fails
- ?Inspect step 03
Then
- →Retie. Do not dress a defective structure and call it seated.
Under-wrapped or messy hitch column
Check
- ?Weak double you cannot trust on a fish
- ?Inspect step 02
Then
- →Retie. Do not dress a defective structure and call it seated.
Bight never completed the hitch pass-through
Check
- ?Unreliable lock
- ?Inspect step 03
Then
- →Retie. Do not dress a defective structure and call it seated.
Same failure class, different geometry. Open the plates — Diagnose still starts from the symptom.
Get it right with everything in your favour0/5 clean
Good light, dry hands, a table. Until the sequence is automatic here there is nothing for the harder rungs to test — you would only be learning that difficult conditions are difficult, which you already knew.
How · Tie it, check it against the list, log it. Five clean and the ladder opens.
Nothing marked. Log it clean, or mark what happened first.
Not ideal for
- ×Maximum big-game double-line strength (Bimini still preferred when you can build it)
- ×Situations where the hitch can work loose under cyclic load without inspection
Strength, and where the number comes from
Not established
Absent from the double-line lab challenge that produced the Bimini and Australian plait figures, and any percentage for it would additionally have to state whether it is of the doubled line or the single strand.
Percentages come from published tests on their own line, their own knot-tyer and their own pull rate. Yours is a different system. Treat a figure as a reason to test, not as a result you already have.
- Take Me Fishing — How to Tie a Spider Hitch Knot
- FishingKnots.com strength database (Spider Hitch band)
Recovered from the historical MODEL_SOURCES registry.
Record reviewed 2026-08-13
Vetted references
- Spider Hitch — NetKnots
NetKnots
- Easiest Way To Tie A Spider Hitch Loop Knot
Salt Strong
Check the finished knot against what correct looks like before you load it.