Palomar Knot
Palomar
Ties line to a hook or lure with the line doubled through the eye. Animated Knots recommends it for braided line; pick it when the eye takes two strands side by side.
Finished structure
Drawn from a rope model of this knot: which strand passes over which comes from where the rope actually lies.
- 1Doubled line through the eye2Tag end
Move 1 of 1Fold the line in two and push the fold through the eyeYou should now see: Two strands lying side by side through the eye, the loop standing well past the hook, no twist between them. Step 01
Double about 15 cm (6 in) of line into a loop and push the loop through the hook eye.
You should now seeTwo strands lying side by side through the eye, the loop hanging well past the hook, no twist between them.
If it goes wrongForcing the doubled line through an eye that is too small. Braid frays on the edge of the eye and the two strands cross.
Fix: Pull the loop back out, lay the strands flat side by side and feed them again. If the eye will not take both strands, pick a different knot.
Why: The loop has to be long enough for the whole hook to pass through it at step 3. Too short and the hook will not clear; much longer and it tangles.
- 1End of the loop, left open
Move 1 of 1Tie a loose overhand in the doubled line, leaving the hook hanging below itYou should now see: A loose overhand in the doubled line, with the end of the loop still open and wider than the hook. Step 02
With the doubled line, tie a loose overhand knot and leave the hook hanging below it.
You should now seeA loose overhand in the doubled line, with the end of the loop still open and wider than the hook.
If it goes wrongSnugging the overhand now, which traps the hook before it can pass through the loop.
Fix: Work the overhand open with a fingertip until the loop is wide enough for the hook again.
Why: This overhand only carries the hook for the next step. It gets tightened last, together with everything else.
- 1Loop, round both strands
Move 1 of 1Pass the hook right through the open end of the loopYou should now see: The loop sits above the eye, clear of the hook, and the hook can turn freely. Step 03
Pass the hook or lure all the way through the open end of the loop.
You should now seeThe loop sits above the eye, clear of the hook, and the hook can turn freely.
If it goes wrongThe loop catching on the point or the bend and staying down on the hook.
Fix: Walk the loop over the point and around the bend by hand instead of pulling it through.
Why: The whole hook has to go through: point, barb and bend. A loop left on the bend makes the knot seat crooked on the eye.
- 1Loop closed round both strands
Move 1 of 1Wet the knot, then pull the standing line and the tag together until it closesYou should now see: Coils stacked evenly against the eye, with no gaps and no strand crossing over another. Step 04
Wet the knot, then pull the standing line and the tag end together, slowly, until the coils close down against the eye.
You should now seeCoils stacked evenly against the eye, with no gaps and no strand crossing over another.
If it goes wrongPulling hard on dry line. Mono and fluoro heat up under a fast pull and weaken before the knot ever sees a fish.
Fix: Stop, wet the knot again and finish the pull in one steady motion.
Why: This pull is where the knot is made. Everything before it is arrangement.
Move 1 of 1Give the knot a firm test pull, then trim the tag shortYou should now see: A short square tag pointing away from the coils, and a knot that did not move under the test pull. Step 05
Give the knot a firm test pull, then trim the tag to a short stub.
You should now seeA short square tag pointing away from the coils, and a knot that did not move under the test pull.
If it goes wrongTrimming before the test pull, or a tag that has been drawn back inside the coils.
Fix: If the knot moved or the tag is buried in the coils, cut it off and tie it again. A tag inside the coils can cut the line at the eye.
Why: Trim last. A knot that slips under your own pull will slip under a fish.
Palomar Knot — construction sequence
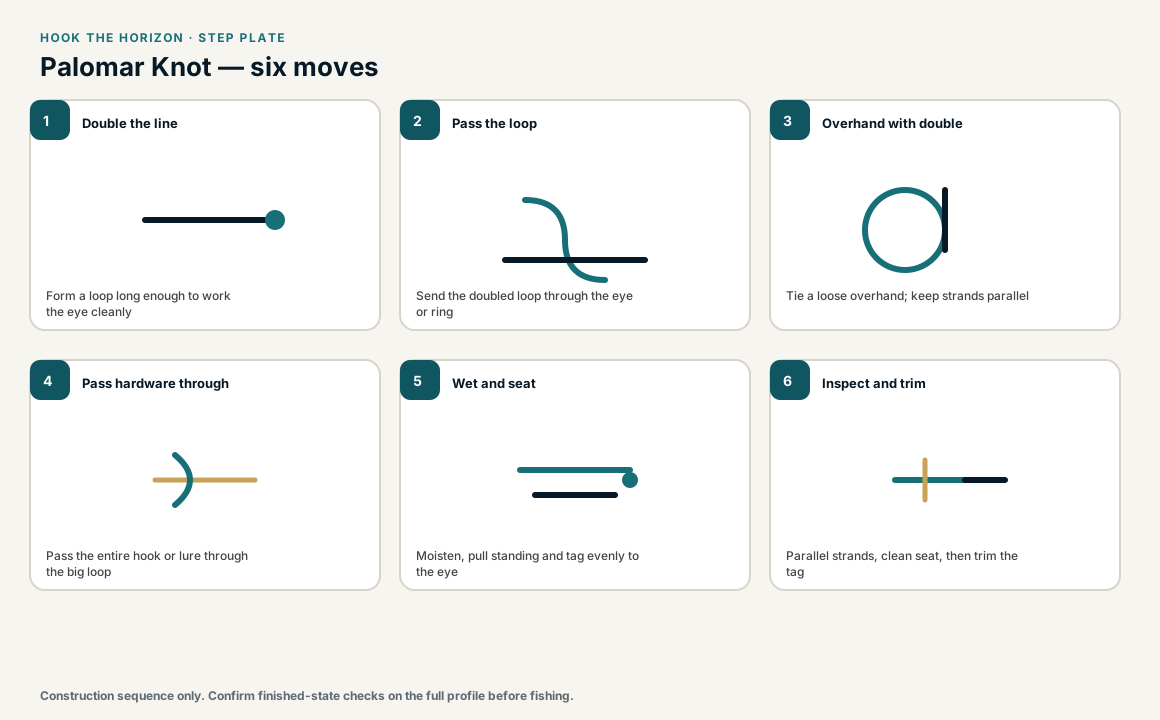
When this family fails, it fails as these. The recovered end still outranks the name.
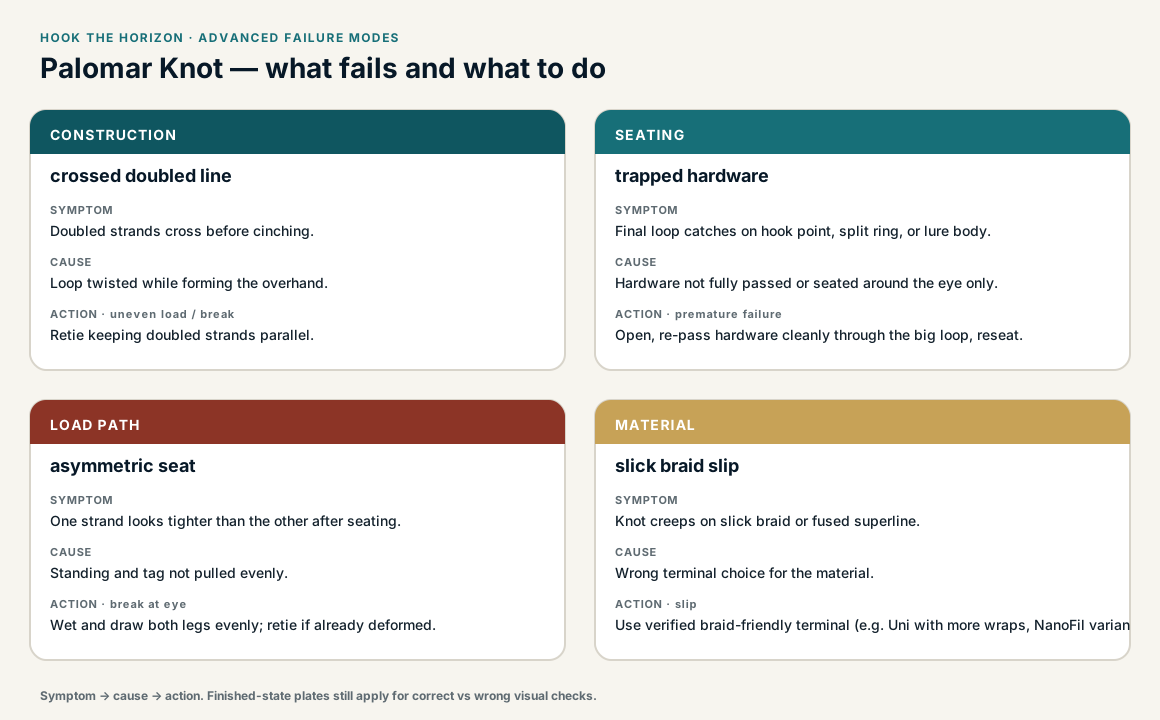
Palomar Knot — what fails and what to do
Doubled line through the eye, overhand lock seated to the hardware.
- !Eye too small for the doubled pass — the stack never sits
- !Doubled overhand not seated against the eye
- !Tag pulled into the doubled coils so the lock becomes a hinge
- !The loop is left on the bend or against the bottom of the eye, so the knot seats crooked. NetKnots warns it can fail tied that way.
- !The final pull was fast and dry, and mono or fluorocarbon heated and weakened at the knot
- !The tag has been drawn back inside the coils, where it can cut the line at the eye
- !The coils cross each other instead of stacking evenly against the eye
Doubled coils crossed at the eye
Load concentrates and can cut through the doubled stack
Palomar retention is even doubled-coil compression against the eye · step 04
Doubled stack never seated to the eye
Walks and abrades under cyclic load
The lock is the seated doubled overhand against the hardware · step 04
Tag pulled into the doubled stack
Slip under shock — the tag is now a hinge
The tag must stay outside the seated Palomar · step 05
Doubled overhand never locked
Structure is not a Palomar yet
Opposing tension after the hardware pass is the lock · step 04
Slips or walks under load
Check
- ?Inspect coil stack against the eye
- ?Confirm tag is not pulled into the knot
Then
- →Retie with moisture
- →Seat with steady opposing pressure
- →Leave a slightly longer tag
Cannot pass doubled line through eye
Check
- ?Compare doubled diameter to eye ID
Then
- →Switch to Uni or Improved Clinch for that terminal
- →Use a smaller diameter leader
Doubled strands cross before cinching.
Check
- ?Look for: Doubled strands cross before cinching.
Then
- →Retie keeping doubled strands parallel.
Final loop catches on hook point, split ring, or lure body.
Check
- ?Look for: Final loop catches on hook point, split ring, or lure body.
Then
- →Open, re-pass hardware cleanly through the big loop, reseat.
One strand looks tighter than the other after seating.
Check
- ?Look for: One strand looks tighter than the other after seating.
Then
- →Wet and draw both legs evenly; retie if already deformed.
Knot creeps on slick braid or fused superline.
Check
- ?Look for: Knot creeps on slick braid or fused superline.
Then
- →Use verified braid-friendly terminal (e.g. Uni with more wraps, NanoFil variant).
Finished check failed — doubled strands cross before cinching
Check
- ?doubled strands remain parallel
- ?overhand section is not crossed over itself
- ?final loop seats around the eye/hardware without trapping against the hook point or split ring
Then
- →Retie. uneven loading and premature breakage.
Doubled coils crossed at the eye
Check
- ?Load concentrates and can cut through the doubled stack
- ?Inspect step 04
Then
- →Retie. Do not dress a defective structure and call it seated.
Doubled stack never seated to the eye
Check
- ?Walks and abrades under cyclic load
- ?Inspect step 04
Then
- →Retie. Do not dress a defective structure and call it seated.
Tag pulled into the doubled stack
Check
- ?Slip under shock — the tag is now a hinge
- ?Inspect step 05
Then
- →Retie. Do not dress a defective structure and call it seated.
Same failure class, different geometry. Open the plates — Diagnose still starts from the symptom.
Not ideal for
- ×Eyes too small to pass the doubled line
- ×Heavy stiff fluorocarbon, which resists seating square on the eye
- ×Situations needing an easy untie