Eye Crosser Knot
Eye Crosser
Snug terminal with doubled eye contact across mono, fluoro, and braid when the hardware has room for two passes.
Finished structure
No drawing of this exact knot yet. The written steps are the reference.
- Diagram in reviewA drawing of the Eye Crosser Knot itself is being made. Until then, follow the written steps.
Step 01
Pass the line through the eye of the hook, leaving a tag long enough to go through the eye again and wrap back around the lines.
No drawing of this exact knot yet. The written steps are the reference.
You should now seeThe line through the eye once, with a long free tag hanging on the far side of the eye.
If it goes wrongLeaving too short a tag. After the second pass and the wraps there is too little left to hold, and the tag slips out during tightening.
Fix: Pull more line through the eye before the second pass. If the tag has already slipped out, start again with more tag.
Why: The tag makes a second pass, lies back along the standing line and then wraps both lines, so it needs more length than a single-pass knot.
- Diagram in reviewA drawing of the Eye Crosser Knot itself is being made. Until then, follow the written steps.
Step 02
Pass the tag through the eye a second time in the same direction, then lay the tag back alongside the standing line.
No drawing of this exact knot yet. The written steps are the reference.
You should now seeTwo turns of line through the eye lying next to each other, and the tag running back parallel to the standing line.
If it goes wrongThe second turn riding over the first in the eye, or the tag twisting around the standing line. The turns stack on top of each other instead of sitting side by side.
Fix: Pull the tag back out of the second pass, feed it through again beside the first turn, and lay the tag flat along the standing line.
Why: Two turns side by side share the load on the eye. A turn lying over the other is pinched against the metal when the knot is pulled.
- Diagram in reviewA drawing of the Eye Crosser Knot itself is being made. Until then, follow the written steps.
Step 03
Wrap the tag end two or three times around the two parallel lines, the standing line and the tag lying beside it, keeping each wrap next to the last.
No drawing of this exact knot yet. The written steps are the reference.
You should now seeTwo or three neat wraps around both parallel lines a short way from the eye, with the tag end coming free from the last wrap.
If it goes wrongWrapping only the standing line instead of both lines, or letting the wraps cross. The wraps slide loose along the line as soon as the tag is pulled.
Fix: Unwind the wraps and lay them again around both lines together, each one beside the last.
Why: The wraps bind the doubled-back tag to the standing line. When the knot is pulled tight they bed down and hold the tag in place.
- Diagram in reviewA drawing of the Eye Crosser Knot itself is being made. Until then, follow the written steps.
Step 04
Pull the tag to snug the wraps, wet the knot, and pull the standing line to slide it down to the eye. Pull the tag and standing line firmly to set it, test it, then trim the tag close.
No drawing of this exact knot yet. The written steps are the reference.
You should now seeA compact knot sitting on the eye with the wraps bedded evenly, no movement under a firm test pull, and a short tag.
If it goes wrongPulling hard on dry line, or trimming before the test pull. A knot that has not bedded down moves along the line when it is loaded.
Fix: If the knot moves or the wraps look loose after the test pull, cut it off and tie it again.
Why: Wetting lets the wraps slide into place without heating the line. The final pull on both the tag and the standing line locks the wraps down behind the turns at the eye.
Eye Crosser Knot — finished-state checks, on the shared reference layout
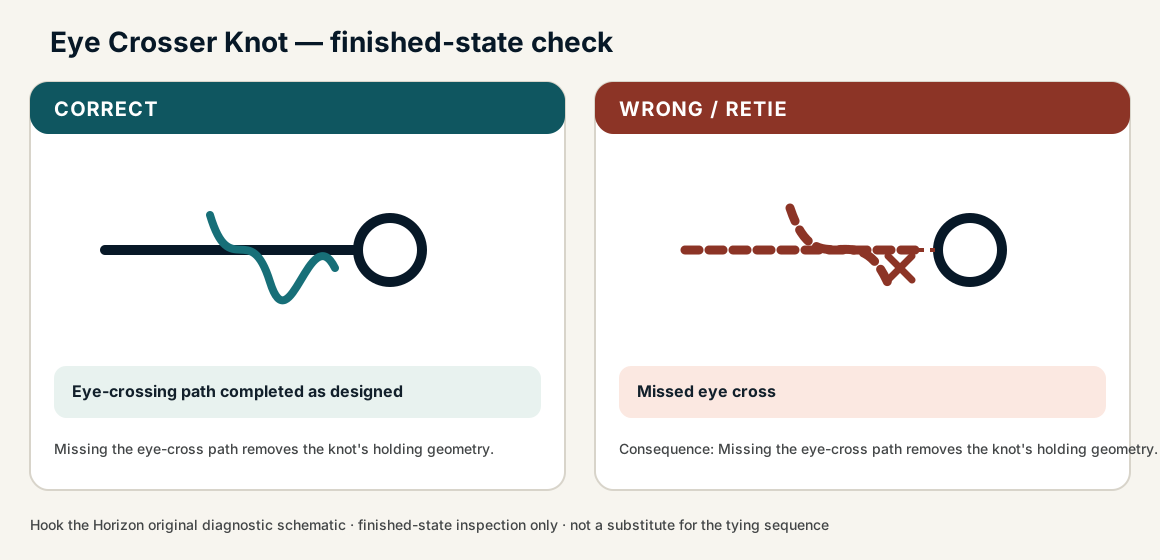
When this family fails, it fails as these. The recovered end still outranks the name.
Braid at the eye with extra passes so the slick line cannot slip.
- !Passes never crossed through the eye
- !Tag not locked after the extra braid passes
- !Used on a small eye that cannot take the bulk
- !Wraps around the standing line only, so they slide loose when the tag is pulled
- !Tightened dry or not bedded down, so the knot moves along the line under load
- !Second turn riding over the first, so it is pinched against the eye when loaded
- !Tag left too short, so it slips out as the knot is tightened
Crossed strands in the eye
Scores the line at the first hard turn
Two clean eye passes, then the lock around the parallel pair · step 02
Eye too small for two passes
Will not seat, or cuts at the eye
Hardware must accept the doubled pass or this is the wrong terminal · step 01
Lock tied on the wrong side
A slip, not an Eye Crosser
The lock around the parallel strands is the finish · step 03
Knot will not seat or scores at the eye
Check
- ?Two parallel strands in the eye
- ?Lock butted to the eye
Then
- →Retie on larger hardware
- →Use Palomar or Uni instead
Finished check failed — Missed eye cross
Check
- ?Eye-crossing path completed as designed
- ?Seated without open loops
- ?Tag exit correct
Then
- →Retie. Missing the eye-cross path removes the knot's holding geometry.
Crossed strands in the eye
Check
- ?Scores the line at the first hard turn
- ?Inspect step 02
Then
- →Retie. Do not dress a defective structure and call it seated.
Eye too small for two passes
Check
- ?Will not seat, or cuts at the eye
- ?Inspect step 01
Then
- →Retie. Do not dress a defective structure and call it seated.
Lock tied on the wrong side
Check
- ?A slip, not an Eye Crosser
- ?Inspect step 03
Then
- →Retie. Do not dress a defective structure and call it seated.
Same failure class, different geometry. Open the plates — Diagnose still starts from the symptom.
Not ideal for
- ×Tiny fly eyes
- ×Crowded hardware where a single-pass Uni or Palomar already fits