Willis Knot
Finger-trap: mono inserted into a hollow lead-core sheath after the lead is pulled.
Advanced · Braid / Monofilament
Connection card
Willis Knot
For braid → leader.
This card does not say how strong the knot is. A retention figure comes from a bench, in one material, at one diameter, tied by somebody who ties it all day — and the line in your hand is none of those. What it does tell you is whether the thing you have just tied is the thing the record describes.
What this plate is telling you
Finger-trap: mono inserted into a hollow lead-core sheath after the lead is pulled.
Save this as a picture and it works with a dead signal and a nearly dead battery, which is when a joint is most often tied badly. The rest of this page — the steps, the seating sequence, the failure modes and the bench — is for the evening before.
Before you start
- ·For lead-core line with a hollow braided sheath. A solid or coated sheath will not grip the leader.
- ·Plan on 4 to 6 inches of empty sheath. The leader goes all the way in to the cut end of the lead, and that length is what grips it.
- ·Keep the cutter off the sheath when you cut the lead. A nicked or worn sheath can split or stop gripping, so check it in good light.
- ·A braided leader needs two loose overhands in the sheath instead of one.
Step 1 of 5. Pinch the lead-core line near its end and slide the outer sheath back 10 to 15 cm (4 to 6 in). Cut the exposed inner lead, then slide the sheath back out straight so its end is empty.
No drawing of this exact knot yet. The written steps are the reference.
swipe to step
01
Pinch the lead-core line near its end and slide the outer sheath back 10 to 15 cm (4 to 6 in). Cut the exposed inner lead, then slide the sheath back out straight so its end is empty.
10 to 15 cm (4 to 6 in) of hollow, unbroken sheath extending past the cut end of the lead.
Nicking the sheath while cutting the lead. A nick shows as broken fibres, and the sheath can split there once it is loaded.
Fix: Cut off the end past the nick and slide the sheath back again on fresh line.
Why: The hollow sheath is what grips the leader. It has to be whole along its length to squeeze down evenly.
- Sheath cut while pulling the lead — The fly-line coating parts — dead line. A ragged break can cut the sheath; that is not a knot failure you dress out.
arrow keys work
Tying procedure — Willis Knot
- Diagram in reviewA drawing of the Willis Knot itself is being made. Until then, follow the written steps.
Step 01 / 5
Pinch the lead-core line near its end and slide the outer sheath back 10 to 15 cm (4 to 6 in). Cut the exposed inner lead, then slide the sheath back out straight so its end is empty.
You should now see: 10 to 15 cm (4 to 6 in) of hollow, unbroken sheath extending past the cut end of the lead.
If it goes wrong: Nicking the sheath while cutting the lead. A nick shows as broken fibres, and the sheath can split there once it is loaded.
Fix: Cut off the end past the nick and slide the sheath back again on fresh line.
Why: The hollow sheath is what grips the leader. It has to be whole along its length to squeeze down evenly.
If wrong: Sheath cut while pulling the lead — The fly-line coating parts — dead line.
- Diagram in reviewA drawing of the Willis Knot itself is being made. Until then, follow the written steps.
Step 02 / 5
Tie a loose overhand knot in the empty sheath, close to where the cut end of the lead sits inside. If the leader is braid, tie two loose overhands instead of one.
You should now see: A loose overhand in the hollow sheath next to the end of the lead, open enough that the hollow still runs through it.
If it goes wrong: Pulling the overhand tight at this stage, which flattens the sheath so the leader will not pass through it. You feel the leader stop at the knot in step 3.
Fix: Work the overhand loose with a fingernail until the sheath under it is round again.
Why: The overhand gets moved to the open end and tightened in step 4. NetKnots adds a second overhand when the leader is braid.
If wrong: Lead left under the grip instead of trapped — Leader slides out.
- Diagram in reviewA drawing of the Willis Knot itself is being made. Until then, follow the written steps.
Step 03 / 5
Slide the mono leader into the open end of the sheath and push it all the way in, through the overhand, until it touches the end of the lead.
You should now see: The leader has gone the full length of the hollow sheath, and you feel it stop against the lead.
If it goes wrong: Stopping partway, often where the overhand pinches the sheath. A short insertion leaves less leader inside for the sheath to grip.
Fix: Loosen the overhand, straighten the sheath, and push the leader in again until it stops at the lead.
Why: The sheath works like a finger trap: the more leader inside it, the longer the length that gets squeezed when the line is pulled.
If wrong: Shallow insertion — Walks on the fish.
- Diagram in reviewA drawing of the Willis Knot itself is being made. Until then, follow the written steps.
Step 04 / 5
Work the overhand along the sheath toward its open end, stopping just short of the end, then pull the overhand tight over the leader inside.
You should now see: A tight overhand sitting just short of the open end of the sheath, with the leader coming straight out of the end.
If it goes wrong: Pushing the overhand off the end of the sheath, or tightening it so far back that the end of the sheath hangs loose around the leader.
Fix: If the overhand has come off the end, cut back to fresh sheath and start again. If it is too far back, loosen it and work it closer to the end.
Why: The overhand clamps the open end of the sheath onto the leader and holds it there while the finger-trap grip takes the load.
- Diagram in reviewA drawing of the Willis Knot itself is being made. Until then, follow the written steps.
Step 05 / 5
Pull hard on the leader and the lead-core line in opposite directions to test the join.
You should now see: The sheath squeezes down around the leader like a finger trap, and the leader does not slip at the overhand.
If it goes wrong: Skipping the test or pulling gently. A join that creeps shows as the leader sliding out of the end of the sheath or the overhand shifting.
Fix: If anything moves, cut the sheath off behind the overhand and tie the knot again, pushing the leader in fully.
Why: NetKnots says the finished knot should not slip under a hard pull. Testing by hand is the only way to find a short insertion before it is fished.
Watch the tie
How to tie a Willis Knot a/k/a "The Leadcore Knot"vikingrainmaker · Opens on YouTubeExternal video from a creator we follow — not produced by us. Nothing on this page loads from YouTube until you follow the link.
Seating sequence — where failures are born
The step list compresses the finish. Run these phases in order, one at a time.
01 Break
Break the lead at the transition without nicking the sheath.
Sharp bend, not a pull.
02 Extract
Slide the lead out, leaving intact hollow braid.
Gentle. The sheath is the knot.
03 Insert
Feed mono deep and milk the sheath down the leader.
Even contraction, no bunching.
04 Prove
Pull lengthwise and inspect. Movement is a retie.
Hard test pull.
05 Commit
Only load it after the structure reads correct. Wrong means remake.
Working load, not a snatch.
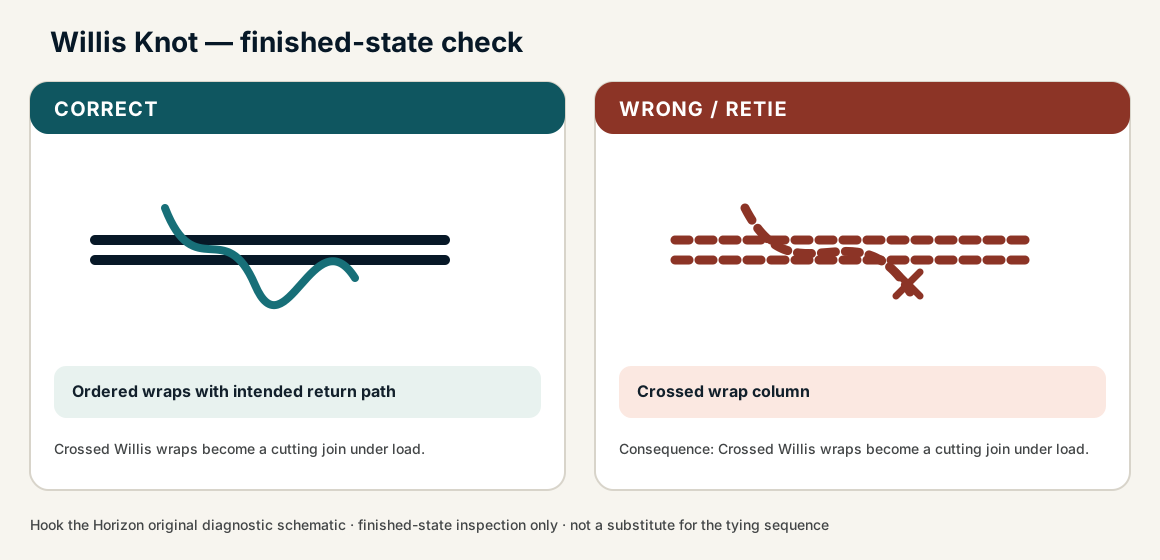
Finished structure — what correct looks like
No drawing of this exact knot yet. The written steps are the reference.
- ·Completed join or loop structure
- ·Fully seated
- ·Tags short and correct path
- ·Even, no crossings
Verify before you load it
Every line is pass or fail. One fail means retie — do not load a knot you argued with.
- 01Completed join or loop structure
- 02Fully seated
- 03Tags short and correct path
- 04Even, no crossings
- 05None
- 06willis
Field notes — dark, cold, gloves
- ·This is a finger-trap, not a barrel. Damage to the sheath is a cut-off.
- ·Do not use on solid braid. The trap has nothing to contract onto.
- ·Dock job. Do not start this in a wind with cold hands.
Willis Knot — finished-state checks, on the shared reference layout
When this family fails, it fails as these. The recovered end still outranks the name.
A grip on a spool arbor or a lead-core sheath — not a join of equals.
- !Too few turns on a slick arbor
- !Sheath cut while the core is pulled
- !Overhand missing on the leader so the trap never sets
- !Sheath nicked or cut while the lead was removed
- !Leader inserted only part of the way to the lead
- !Sheath worn, so it no longer grips even where it looks whole
- !Braided leader held with one overhand instead of two
Lead left under the grip instead of trapped
Leader slides out
The sheath must close over a trapped lead, not sit on it · step 02
Shallow insertion
Walks on the fish
Insertion depth is the Willis trap · step 03
Sheath cut while pulling the lead
The fly-line coating parts — dead line
A ragged break can cut the sheath; that is not a knot failure you dress out · step 01
Leader slides out or the sheath parts
Check
- ?Sheath intact
- ?Insertion length
- ?No lead under the trap
Then
- →Cut back and restart
- →Do not use on solid braid
Finished check failed — Crossed wrap column
Check
- ?Ordered wraps with intended return path
- ?Compact slim junction
- ?Tags controlled
Then
- →Retie. Crossed Willis wraps become a cutting join under load.
Lead left under the grip instead of trapped
Check
- ?Leader slides out
- ?Inspect step 02
Then
- →Retie. Do not dress a defective structure and call it seated.
Shallow insertion
Check
- ?Walks on the fish
- ?Inspect step 03
Then
- →Retie. Do not dress a defective structure and call it seated.
Sheath cut while pulling the lead
Check
- ?The fly-line coating parts — dead line
- ?Inspect step 01
Then
- →Retie. Do not dress a defective structure and call it seated.
Same failure class, different geometry. Open the plates — Diagnose still starts from the symptom.
Get it right with everything in your favour0/5 clean
Good light, dry hands, a table. Until the sequence is automatic here there is nothing for the harder rungs to test — you would only be learning that difficult conditions are difficult, which you already knew.
How · Tie it, check it against the list, log it. Five clean and the ladder opens.
Nothing marked. Log it clean, or mark what happened first.
Not ideal for
- ×Solid braid
- ×Normal mono/fluoro main line
- ×Damaged sheath
Strength, and where the number comes from
Not established
Depends on an intact fly-line sheath and insertion length rather than on a knot geometry, and no publisher states a figure for it.
Percentages come from published tests on their own line, their own knot-tyer and their own pull rate. Yours is a different system. Treat a figure as a reason to test, not as a result you already have.
- NetKnots — Willis Knot
- Hook the Horizon — Willis Knot
Recovered from the same record’s historical Hook the Horizon resource URL.
- NetKnots fishing knot references
Recovered from this record’s historical modelSourceId registry.
Record reviewed 2026-08-14
Vetted references
- Willis Knot
Hook the Horizon
- How to tie a Willis Knot a/k/a "The Leadcore Knot"
vikingrainmaker
Related knots
Check the finished knot against what correct looks like before you load it.