Dropper Loop
Blood dropper loop
A fixed loop that stands out from the middle of a line or leader, as an attachment point for an extra fly or hook. Keep it short to limit fouling and twisting.
Twists either side of a mid-line opening; the loop stands perpendicular to the main line.
Finished structure
Twists either side of a mid-line opening; the loop stands perpendicular to the main line.
step 01 · schematic Mid-line, not an end.
Step 01
Make a large loop in the line at the point where you want the dropper, and pinch the crossing point where the two sides of the loop meet.
Mid-line, not an end.
You should now seeA loop hanging from the line at the chosen spot, both ends of the line free, held at the crossing between finger and thumb.
If it goes wrongMaking the loop much longer than needed. A long dropper tangles around the main line when it is fished.
Fix: Let some of the loop back into the line before you start the turns. The turns use up line, so the finished loop comes out shorter than this one.
Why: The knot forms around the crossing point, so this is where the dropper will stand out from the line. Choose the spot now, because the knot cannot slide along the line once the turns are in.
step 02 · schematic Twists either side of the opening.
Step 02
Holding the crossing point, wrap one side of the loop around the line about six times, keeping a fingertip in the centre so the turns build up evenly on both sides of it.
Twists either side of the opening.
You should now seeA twisted section with matching turns on either side of a small opening in the middle, and the rest of the loop hanging below.
If it goes wrongUneven turns, or turns that cross over each other. You see more twists on one side of the centre opening than the other.
Fix: Unwind the turns and wrap again, counting each side and holding the centre open with a fingertip.
Why: Animated Knots notes the finished knot should look almost symmetrical either side of the loop. Turns bunched on one side pull the loop crooked, so it lies along the line instead of standing out.
step 03 · schematic The loop pulled through, standing perpendicular.
Step 03
Open the gap at the centre of the turns and push the bottom of the loop up through it. Hold the loop there with your teeth or a finger.
The loop pulled through, standing perpendicular.
You should now seeThe loop sticking out through the middle of the twisted section, with the same number of turns on each side of it.
If it goes wrongPushing the loop through a gap off the centre, or letting go so it springs back out. The loop pulls out, or the knot closes lopsided.
Fix: Pull the loop back out, find the centre again with a fingertip, and push it through there. Keep hold of it until the knot is tight.
Why: Only the pull in the next step holds the loop in the knot. Released now, it slides straight back out through the opening.
step 04 · schematic Loop should stand off the main line, not collapse into it.
Step 04
Wet the turns and, still holding the loop, pull both ends of the line apart slowly and evenly until the turns close up and the loop stands out from the line.
Loop should stand off the main line, not collapse into it.
You should now seeTight turns on both sides of a loop that stands out at an angle from the line rather than lying flat along it.
If it goes wrongSnatching the ends, or pulling one harder than the other. The turns close unevenly and the loop leans to one side.
Fix: A dropper that has closed crooked cannot be reset by pulling harder. Tie it again on a fresh section of line.
Why: Animated Knots notes that tightening this knot in nylon changes its structure: the turns redistribute so the inner strand becomes an outer wrap. A slow pull gives the turns room to roll into place.
Dropper Loop — finished-state checks, on the shared reference layout
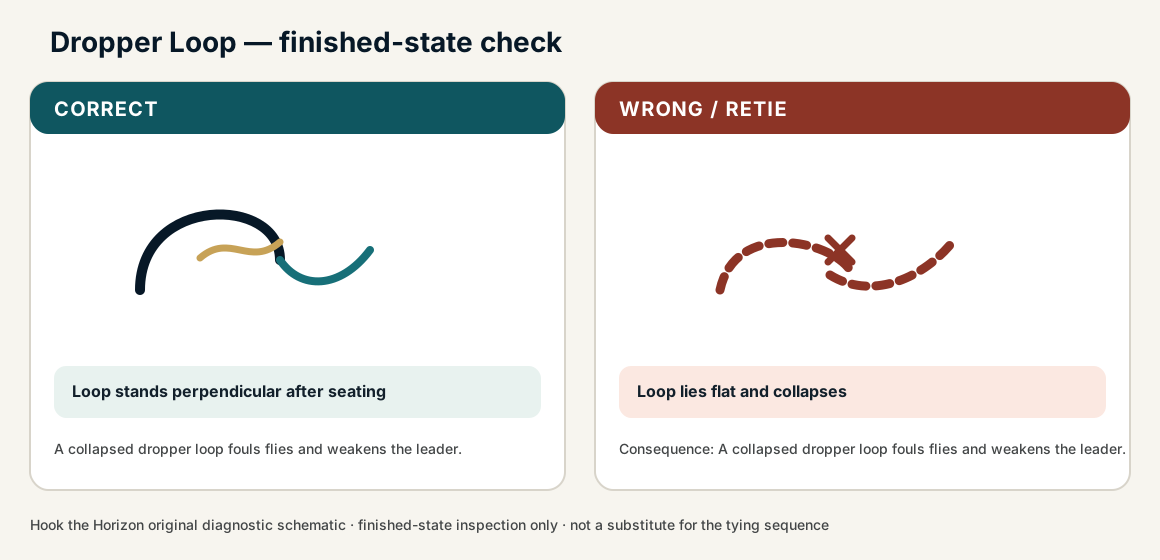
When this family fails, it fails as these. The recovered end still outranks the name.
A loop that either stands as a dropper or handshake onto another loop.
- !Dropper loop collapsed into an overhand
- !Handshake twisted so one loop saws the other
- !Loop sized after it was already loaded
- !Loop released before tightening, so it slides back out through the opening
- !Loop pushed through off centre, so it pulls out or the knot closes lopsided
- !Ends snatched or pulled unevenly, so the loop leans along the line instead of standing out
- !Loop tied too long, so it fouls and twists around the main line
Dropper lock incomplete — loop collapses
Dropper fails and the fly is gone
The pass-through lock is the dropper; a collapse is unfinished · step 03
Twists not even — weakens the main
The mainline is the failure, not the dropper
Neat twists preserve mainline strength around the loop · step 02
Pass-through never completed
Not a dropper — a malformed overhand on the main
The pass-through must complete before any load · step 03
Loop lies along the main line instead of standing out
Check
- ?Count twists either side of the loop base
Then
- →Retie with symmetrical twists and a centred pass-through
Finished check failed — Loop lies flat and collapses
Check
- ?Loop stands perpendicular after seating
- ?Wraps ordered around the standing line
- ?Loop size matches intended dropper length
Then
- →Retie. A collapsed dropper loop fouls flies and weakens the leader.
Dropper lock incomplete — loop collapses
Check
- ?Dropper fails and the fly is gone
- ?Inspect step 03
Then
- →Retie. Do not dress a defective structure and call it seated.
Twists not even — weakens the main
Check
- ?The mainline is the failure, not the dropper
- ?Inspect step 02
Then
- →Retie. Do not dress a defective structure and call it seated.
Pass-through never completed
Check
- ?Not a dropper — a malformed overhand on the main
- ?Inspect step 03
Then
- →Retie. Do not dress a defective structure and call it seated.
Same failure class, different geometry. Open the plates — Diagnose still starts from the symptom.
Not ideal for
- ×Terminal strength jobs
- ×Braid, which will not hold the twist column