Uni Snell Knot
Snell Knot — Uni Version · Uni snell
Snelling a hook with uni knot turns taken around both the shank and the line, for an even, straight-line pull to the fish.
Finished structure
No drawing of this exact knot yet. The written steps are the reference.
- Diagram in reviewA drawing of the Uni Snell Knot itself is being made. Until then, follow the written steps.
Step 01
Push the line through the hook eye and run it down along the shank. Form a loop below the hook with the tag so the loop lies against the shank and the line together.
No drawing of this exact knot yet. The written steps are the reference.
You should now seeThe line runs through the eye and down the shank, with an open loop of tag lying against the shank and plenty of tag left over.
If it goes wrongForming the loop around the line only, away from the shank. The turns then catch the line alone and it becomes a plain uni knot, not a snell.
Fix: Lay the loop back against the shank so the shank sits inside it before you start the turns.
Why: A snell grips the shank so the pull runs straight along it toward the point. The loop has to include the shank for that to happen.
- Diagram in reviewA drawing of the Uni Snell Knot itself is being made. Until then, follow the written steps.
Step 02
Pass the tag around the hook shank and the line lying on it, and through the loop, 4 to 6 times. Keep each turn tight against the last.
No drawing of this exact knot yet. The written steps are the reference.
You should now seeFour to six turns lying side by side, each one around both the shank and the line on it.
If it goes wrongA turn that catches only the line and not the shank, or turns spreading apart. The finished snell then slides along the shank instead of holding.
Fix: Unwind the turns and wrap again, checking that the shank is inside every turn and each turn sits against the last.
Why: Every turn has to enclose the shank. The turns are what clamp the line to the hook once the knot is closed.
- Diagram in reviewA drawing of the Uni Snell Knot itself is being made. Until then, follow the written steps.
Step 03
Wet the turns and work the coils along the shank up to the eye, then pull the tag and the standing line to tighten.
No drawing of this exact knot yet. The written steps are the reference.
You should now seeA tight barrel of turns seated right behind the eye, with the standing line coming straight off the eye.
If it goes wrongTightening the turns before sliding them up. The barrel locks partway along the shank and the hook pulls at an angle.
Fix: If the barrel has locked short of the eye, cut it off and tie again, sliding the coils up to the eye before the final pull.
Why: Wetting lets the coils slide up the shank without heating the line. Seated at the eye, the pull runs along the shank.
- Diagram in reviewA drawing of the Uni Snell Knot itself is being made. Until then, follow the written steps.
Step 04
Check that the turns sit side by side with none crossing, then trim the tag close to the barrel.
No drawing of this exact knot yet. The written steps are the reference.
You should now seeParallel turns on the shank, none riding over another, and a short tag that does not catch on a finger.
If it goes wrongMissing a crossed turn and trimming anyway. A crossed turn does not bed down and becomes the place where the snell slips or breaks.
Fix: Look along the barrel before you cut. If a turn has crossed, cut the knot off and tie a new one rather than trying to work it straight.
Uni Snell Knot — finished-state checks, on the shared reference layout
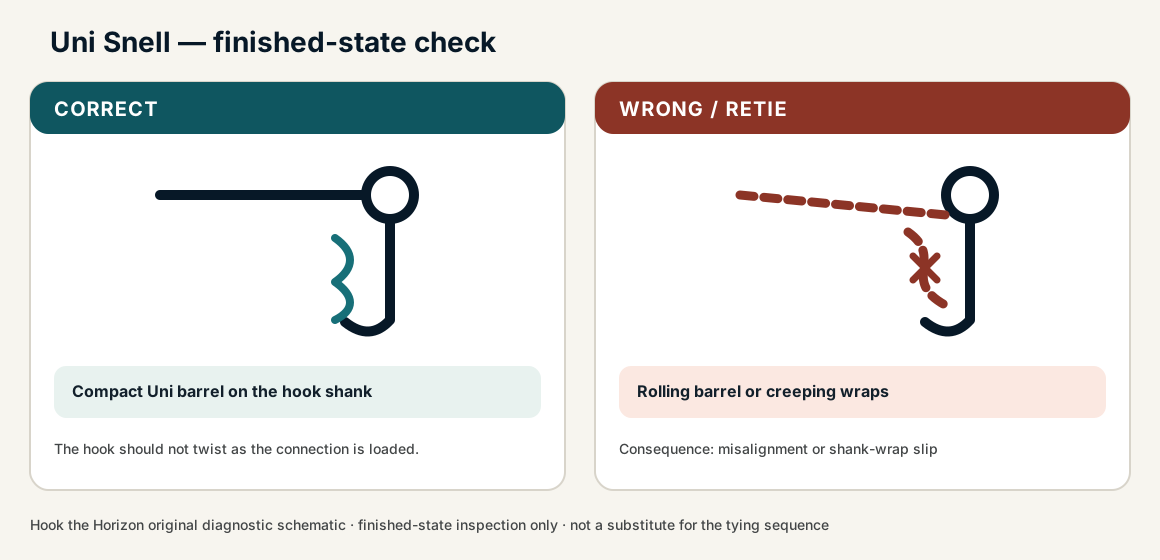
When this family fails, it fails as these. The recovered end still outranks the name.
Uni Snell Knot — what fails and what to do
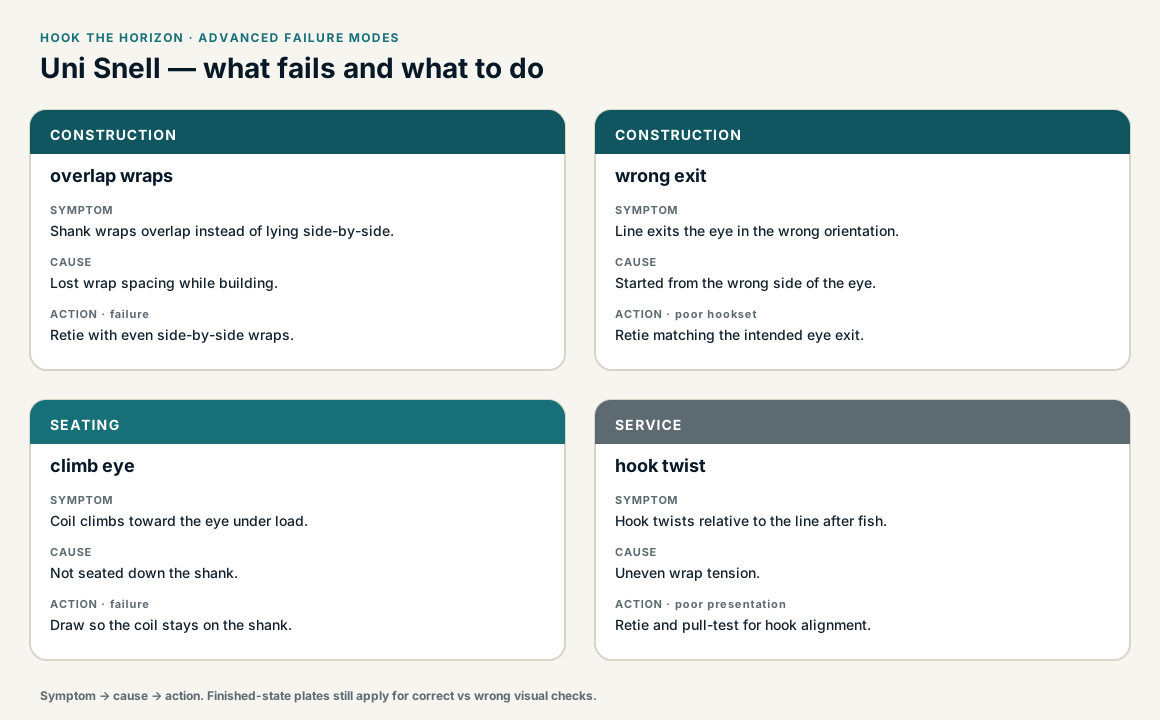
Wraps on the shank that capture the eye; the hook is the hardware.
- !Wraps walked off the shank
- !Eye never captured — the snell is a clinch in disguise
- !Bait loop closed, or the hair not trapped
- !A turn missed the shank, so the snell slides along it
- !Barrel tightened partway down the shank, so the hook pulls at an angle
- !A crossed turn that does not bed down, which slips or breaks under load
- !Cinched quickly while dry, which can burn the leader
Barrel around the standing line only
That is a Uni, not a snell — the hook rotates
A Uni snell wraps the shank, then compresses to the eye · step 02
Finish mid-shank
Hook rotates off-axis under load
The barrel must compress all the way to the eye · step 03
No shank to snell
Wrong family — pick a terminal that uses the eye
A snell needs a shank; an eyed-only hook is a different job · step 01
Barrel slides on shank
Check
- ?Even barrel on shank
Then
- →Retie under tension
Shank wraps overlap instead of lying side-by-side.
Check
- ?Look for: Shank wraps overlap instead of lying side-by-side.
Then
- →Retie with even side-by-side wraps.
Line exits the eye in the wrong orientation.
Check
- ?Look for: Line exits the eye in the wrong orientation.
Then
- →Retie matching the intended eye exit.
Coil climbs toward the eye under load.
Check
- ?Look for: Coil climbs toward the eye under load.
Then
- →Draw so the coil stays on the shank.
Hook twists relative to the line after fish.
Check
- ?Look for: Hook twists relative to the line after fish.
Then
- →Retie and pull-test for hook alignment.
Finished check failed — barrel rolls around the shank
Check
- ?Uni barrel lies cleanly on the hook shank
- ?line exits through the eye in the intended direction
- ?wraps remain compact during a load test
Then
- →Retie. misalignment or shank-wrap slip.
Barrel around the standing line only
Check
- ?That is a Uni, not a snell — the hook rotates
- ?Inspect step 02
Then
- →Retie. Do not dress a defective structure and call it seated.
Finish mid-shank
Check
- ?Hook rotates off-axis under load
- ?Inspect step 03
Then
- →Retie. Do not dress a defective structure and call it seated.
No shank to snell
Check
- ?Wrong family — pick a terminal that uses the eye
- ?Inspect step 01
Then
- →Retie. Do not dress a defective structure and call it seated.
Same failure class, different geometry. Open the plates — Diagnose still starts from the symptom.
Not ideal for
- ×When a traditional snell is already automatic and preferred
- ×Ring-eye-only hooks with no shank to wrap