Knotless Knot
Hair-rig knot · Knotless hair rig
Hair-rig hook-shank connection so bait sits off the hook; wraps trap the hair and align the hooklink.
Finished structure
No drawing of this exact knot yet. The written steps are the reference.
- Diagram in reviewA drawing of the Knotless Knot itself is being made. Until then, follow the written steps.
Step 01
Tie a small loop in the end of the hooklink for the bait, then thread the long end through the hook eye toward the point. Slide it until the loop hangs past the bend at the length you want.
No drawing of this exact knot yet. The written steps are the reference.
You should now seeA bait held on the loop would sit just below the bend and touch it lightly, with the long end of the hooklink coming out of the eye on the point side.
If it goes wrongLeaving the hair length rough and planning to adjust it later. Once the wraps go on in step 3 the hair cannot be made longer or shorter.
Fix: Hold a bait against the hook now and slide the hooklink through the eye until the bait just touches the bend.
Why: The wraps trap the hair against the shank, so its length is fixed from then on. A long hair puts the bait far from the hook; a short one pulls the bait up against the point.
- Diagram in reviewA drawing of the Knotless Knot itself is being made. Until then, follow the written steps.
Step 02
Pinch the hair against the shank with finger and thumb so it runs straight from the eye down to the bend, with the bait loop hanging below.
No drawing of this exact knot yet. The written steps are the reference.
You should now seeThe hair lies flat along the shank without spiralling around it, and the loop still hangs at the length you set in step 1.
If it goes wrongThe hair creeping around the shank or sliding back through the eye while you hold it. You see it twist around the hook or the loop move up or down.
Fix: Let go, check the length against a bait again, and pinch the hair straight along the shank before any wraps go on.
Why: The wraps only grip what lies under them. A hair lying straight is clamped along its whole length; a twisted one leaves gaps where it can slip.
- Diagram in reviewA drawing of the Knotless Knot itself is being made. Until then, follow the written steps.
Step 03
Wrap the long end of the hooklink tightly around the shank and the hair 7 or 8 times, working from the eye toward the bend, each turn lying next to the last.
No drawing of this exact knot yet. The written steps are the reference.
You should now seeA neat row of 7 or 8 turns covering the shank below the eye, with the hair coming out from under the last turn toward the bend.
If it goes wrongTurns crossing over each other or left with gaps between them. Loose, crossed turns slide toward the bend under load and let the hair move.
Fix: Unwind back to the last neat turn and wrap on from there, keeping light tension on the hooklink so each turn beds down.
Why: The turns clamp the hair to the shank. Stopping before the bend keeps them on the straight part of the hook, where they have nothing to slide down onto.
- Diagram in reviewA drawing of the Knotless Knot itself is being made. Until then, follow the written steps.
Step 04
Pass the long end back through the eye toward the point, the same direction as the first pass. Hold the hair in place and pull the hooklink tight.
No drawing of this exact knot yet. The written steps are the reference.
You should now seeThe hooklink leaves the eye on the point side, the wraps are snug, and they do not shift when you push them with a fingernail.
If it goes wrongThreading the hooklink back through the eye the opposite way to the first pass, so it leaves the eye on the back of the shank and pulls the hook the wrong way.
Fix: Pull the end back out and thread it through again toward the point. If the wraps have loosened, unwind them and start again from step 3.
Why: Line leaving the eye toward the point sets the angle of pull that turns the hook toward the fish's bottom lip. Fit the bait and the bait stop on the hair loop after the knot is tight.
Knotless Knot — finished-state checks, on the shared reference layout
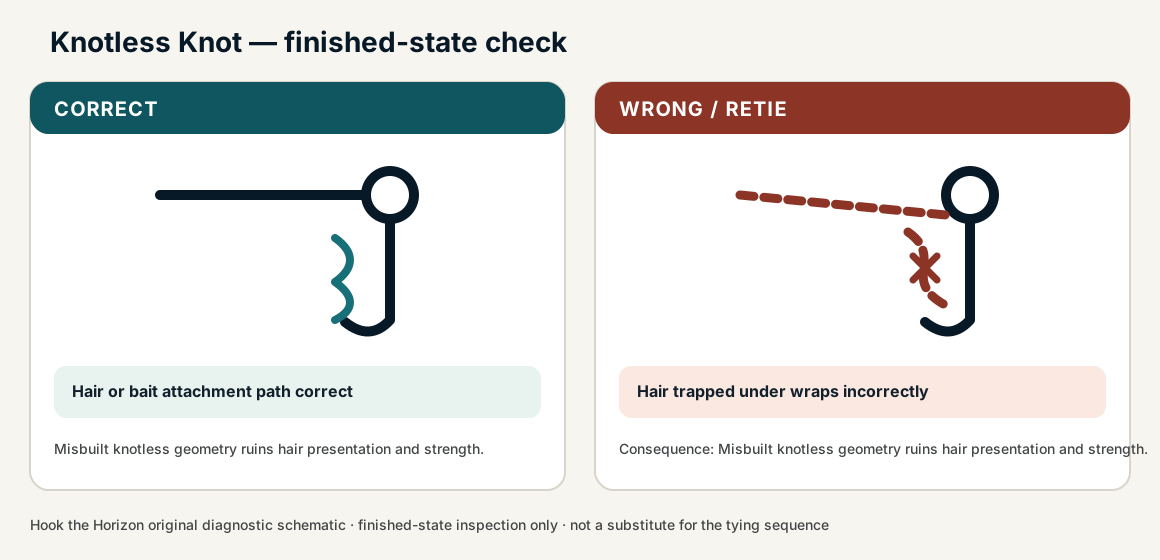
When this family fails, it fails as these. The recovered end still outranks the name.
Wraps on the shank that capture the eye; the hook is the hardware.
- !Wraps walked off the shank
- !Eye never captured — the snell is a clinch in disguise
- !Bait loop closed, or the hair not trapped
- !Wraps crossed or gapped, so they slide toward the bend and let the hair move
- !Hair twisted around the shank, leaving gaps under the wraps where it can slip
- !Hooklink leaves the eye on the back of the shank and pulls the hook the wrong way
Crossed shank column walking onto the bend
Hair/bait sits wrong and the hook-turn is lost
Even shank wraps, hair trapped at the set length · step 03
Hair length set after the wraps
You cannot fix bait position after the column
Set hair first; the column locks length · step 01
Line exits the eye the wrong way
Missed hook-turn — the knotless path is reversed
Eye-exit direction is the rig, not a trim detail · step 04
Bait sits wrong or wraps walk onto the bend
Check
- ?Even shank column
- ?Hair length unchanged after the set
- ?Exit direction matches the intended turn
Then
- →Retie and set hair length first
- →Compare Egg Loop if you need a bait loop without a hair
Finished check failed — Hair trapped under wraps incorrectly
Check
- ?Hair or bait attachment path correct
- ?Shank wraps ordered
- ?Exit direction matches intended presentation
Then
- →Retie. Misbuilt knotless geometry ruins hair presentation and strength.
Crossed shank column walking onto the bend
Check
- ?Hair/bait sits wrong and the hook-turn is lost
- ?Inspect step 03
Then
- →Retie. Do not dress a defective structure and call it seated.
Hair length set after the wraps
Check
- ?You cannot fix bait position after the column
- ?Inspect step 01
Then
- →Retie. Do not dress a defective structure and call it seated.
Line exits the eye the wrong way
Check
- ?Missed hook-turn — the knotless path is reversed
- ?Inspect step 04
Then
- →Retie. Do not dress a defective structure and call it seated.
Same failure class, different geometry. Open the plates — Diagnose still starts from the symptom.
Not ideal for
- ×Ordinary lure or hook terminal work
- ×Any job that is not a hair rig