Easy Snell Knot
Easy snell
A simple way to snell a hook, with 5 to 7 wraps around the shank and line, for a straight-line pull when you set the hook.
Finished structure
No drawing of this exact knot yet. The written steps are the reference.
- Diagram in reviewA drawing of the Easy Snell Knot itself is being made. Until then, follow the written steps.
Step 01
Push the tag through the hook eye toward the point, form a small loop, and bring the tag behind the hook shank. Leave about 10 cm (4 in) of tag.
No drawing of this exact knot yet. The written steps are the reference.
You should now seeThe line runs through the eye toward the point, with a small loop lying along the shank and the tag behind the shank.
If it goes wrongStarting with a short tag, or threading the eye away from the point. The tag runs out during the wraps, or the line leaves the eye the wrong way.
Fix: Pull the line back out and thread it through the eye toward the point, with about 10 cm (4 in) of tag.
Why: The small loop formed here is where the tag finishes at step 3, so it needs to stay open while you wrap.
- Diagram in reviewA drawing of the Easy Snell Knot itself is being made. Until then, follow the written steps.
Step 02
Wrap the tag around the hook shank and the line, working from the point end toward the eye. Make 5 to 7 wraps.
No drawing of this exact knot yet. The written steps are the reference.
You should now seeFive to seven wraps side by side along the shank, moving toward the eye, with the small loop still open ahead of them.
If it goes wrongWraps stacking on each other or wandering off the shank. Stacked wraps pinch the line and the snell seats unevenly.
Fix: Unwind to the last neat wrap and lay the rest side by side, holding the finished wraps with your thumb.
Why: Each wrap traps the line against the shank, so the load on the hook runs along the shank toward the point.
- Diagram in reviewA drawing of the Easy Snell Knot itself is being made. Until then, follow the written steps.
Step 03
Feed the tag out through the loop from underneath to the top. Hold the wraps in place with your thumb and pull the tag to close the loop.
No drawing of this exact knot yet. The written steps are the reference.
You should now seeThe loop closed down over the wraps, with the tag coming out beside the eye and the wraps still lying side by side.
If it goes wrongPulling the standing line first while the wraps are unsupported. The wraps slide and bunch before the tag has closed the loop.
Fix: Let go of the standing line, push the wraps back into a neat row with your thumb, and pull the tag again.
Why: The tag pull closes the loop around the wraps while you hold them in place.
- Diagram in reviewA drawing of the Easy Snell Knot itself is being made. Until then, follow the written steps.
Step 04
Keep holding the wraps and pull both ends very tight, then clip the tag.
No drawing of this exact knot yet. The written steps are the reference.
You should now seeNeat wraps closed on the shank behind the eye, the line coming straight off the eye, and a short clipped tag.
If it goes wrongClipping the tag before the final pull. The wraps can slip back along the shank with no tag left to pull.
Fix: If the wraps have bunched or crossed, cut it off and tie again. Hold the wraps, pull the tag, then pull both ends.
Why: The final pull on both ends sets the wraps tight on the shank, so the line comes straight off the eye.
Easy Snell Knot — finished-state checks, on the shared reference layout
When this family fails, it fails as these. The recovered end still outranks the name.
Wraps on the shank that capture the eye; the hook is the hardware.
- !Wraps walked off the shank
- !Eye never captured — the snell is a clinch in disguise
- !Bait loop closed, or the hair not trapped
- !Wraps stacked on each other, so they pinch the line and seat unevenly
- !Standing line pulled before the tag, so the wraps slide and bunch
- !Cinched quickly while dry, which can burn the leader
Stacked shank wraps cutting the line
Column walks onto the bend
Even turns to the eye, not a pile on the bend · step 02
Loose finish, column not to the eye
Slides down the shank on the first fish
A snell that does not reach the eye is unfinished · step 04
Loaded the tag instead of the standing line
Twists the hook off-axis
The standing line must take the load along the shank · step 03
Slides down shank
Check
- ?Parallel wrap inspection
Then
- →Retie under light tension
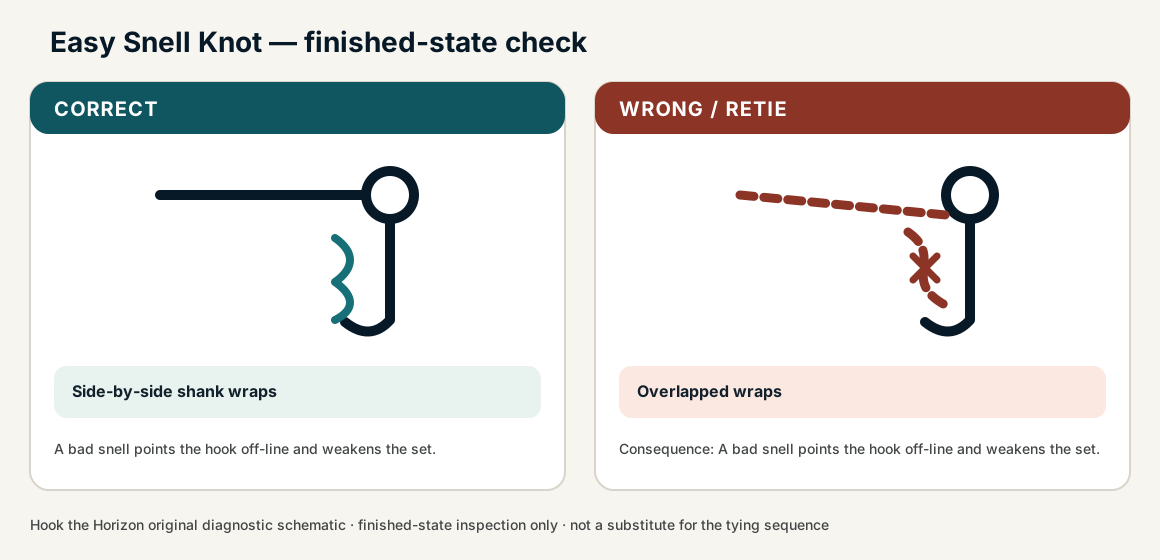
Finished check failed — Overlapped wraps
Check
- ?Side-by-side shank wraps
- ?Intended eye exit orientation
- ?Hook alignment stable after pull
Then
- →Retie. A bad snell points the hook off-line and weakens the set.
Stacked shank wraps cutting the line
Check
- ?Column walks onto the bend
- ?Inspect step 02
Then
- →Retie. Do not dress a defective structure and call it seated.
Loose finish, column not to the eye
Check
- ?Slides down the shank on the first fish
- ?Inspect step 04
Then
- →Retie. Do not dress a defective structure and call it seated.
Loaded the tag instead of the standing line
Check
- ?Twists the hook off-axis
- ?Inspect step 03
Then
- →Retie. Do not dress a defective structure and call it seated.
Same failure class, different geometry. Open the plates — Diagnose still starts from the symptom.
Not ideal for
- ×When traditional or Uni snell geometry is already preferred and practiced
- ×Heavy braid terminals